


End-to-End Testing Blockchain Applications
Rommert Zijlstra
16 min read·
More shop talk today. We’re going to have some fun with End-to-End testing blockchain applications.
What I’m not going to write about is testing philosophy. The discourse on why, what and how to test is saturated enough. I’ll just leave it at the following. I like tests. They provide confidence my code is working as intended. I like tests with a high ROI better than tests with a low ROI. In some cases TDD helps in designing an API. In most cases E2E is all you need.
In all cases one test is infinitely better than no test.
A long while back (over a year ago—84 years in web3 time), I wrote a piece on how we approached E2E testing for our v2 protocol application. The basic initial setup is still the same:
Playwright as the test runner.
Foundry’s Anvil for running a testnet node.
Wagmi & Viem to connect wallets and interface with the blockchain.
Leverage Wagmi’s mock connector to set up a testing wallet.
The previous article provided a get-running-quick tutorial. This one will be more in-depth. The goal is setting up a web3-ready Remix boilerplate with a big focus on E2E testing.
If you just want to see the code, there’s an example repository on GitHub you can check out.
Lets get this show on the road. The following will create a Remix starter repository:
npx create-remix@latest --yes blockchain-web-app-e2e-testing-remix-wagmi \
  && cd blockchain-web-app-e2e-testing-remix-wagmi
Make sure to install Viem, Wagmi and Tanstack Query as dependencies. We also need to install Playwright as a development dependency. And install Playwright’s browsers.
npm install --save-exact @tanstack/react-query viem wagmi
npm install --save-dev @playwright/test
npx playwright install
Grab the example configuration from playwright.dev and save it to the file playwright.config.ts. There is one tiny change we might want to make, which is the fullyParallel flag.
  ...
  // Run all tests in parallel.
  fullyParallel: false,
  ...
The reason we probably want to switch this off is because, if fullyParallel is enabled, Playwright—assuming there are workers available—will not only execute separate test suites in parallel but also execute each test in a test suite in parallel. When testing against a blockchain there’s often a linearity to the tests, requiring you to execute things serially as opposed to fully parallel.
We will get back to this at the end of the article.
Lets add our first test in tests/smoke.spec.ts:
// tests/smoke.spec.ts
import { expect, test } from '@playwright/test';

test('load the homepage', async ({ page }) => {
  await page.goto('/');
  await expect(page).toHaveTitle('New Remix App');
});
Update scripts in package.json to execute Playwright:
// package.json
    "start": "remix-serve ./build/server/index.js",
    "test": "playwright test",
    "typecheck": "tsc
And run it:
npm run build
npm run test
Okay. One more thing. Notice the webServer.reuseExistingServer option in playwright.config.ts. This tells Playwright, if an existing process exposed on webServer.url returns a valid response, it won’t execute webServer.command. This allows us to run tests against our development server. Unfortunately, Vite uses :5173 as the port when executing it in development mode. Lets fix this by pinning the development server to host: '0.0.0.0' and port: 3000.
// vite.config.ts
export default defineConfig({
  plugins: [remix(), tsconfigPaths()],
  server: { host: '0.0.0.0', port: 3000 },
});
Alright, sparky! We can now run the test against the dev server. Get that running with npm run dev.
We need a local RPC node. Why do we need a local RPC node? Because testing on a live chain is anything but idempotent. With a local testnet node you can spin up a fresh blockchain state each run. It also enables you to snapshot and/or revert/restore the chain state. Moreover, it allows you to fork an EVM-compatible chain at a certain block number. All this tooling is essential for any serious testing of blockchain applications.
And, it will save you a whole load of gas.
We prefer Foundry’s Anvil, but if you’re familiar with Hardhat or Truffle the same principles and processes should apply, roughly. I’ll refer to the Foundry installation instructions to get it set up.
After installing Foundry, open a new terminal and execute anvil. This will boot up your testnet node to develop against.
Lets set up Wagmi. Create app/wagmi.ts and paste in the following:
// app/wagmi.ts
import { createClient, http } from "viem";
import { createConfig } from "wagmi";
import { injected } from "wagmi/connectors";
import { foundry, mainnet } from "wagmi/chains";

const chains = [mainnet, foundry] as const;

export const config = createConfig({
  chains,
  client: ({ chain }) => createClient({ chain, transport: http() }),
  connectors: [injected()],
  ssr: true, // you want this to avoid hydration errors.
});
The next step is setting up our Remix application to make use of our Wagmi configuration. Note that we’re putting the QueryClient in a useState because we need this to be unique for every visitor. If you’d use a non-useState initialized QueryClient the client would be shared by all visitors on the server-side parts of Remix. Anyway. We’re going to do the same for the Wagmi configuration because we want to change this on-the-fly later.
// app/root.tsx
import { QueryClientProvider, QueryClient } from "@tanstack/react-query";
import {
Links,
Meta,
Outlet,
Scripts,
ScrollRestoration,
} from "@remix-run/react";
import { useState } from "react";
import { WagmiProvider } from "wagmi";
import { config } from "~/wagmi";
export function Layout({ children }: { children: React.ReactNode }) {
const [queryClient] = useState(new QueryClient());
const [wagmiConfig] = useState(config);
return (
<html lang="en">
<head>
<meta charSet="utf-8" />
<meta name="viewport" content="width=device-width, initial-scale=1" />
<Meta />
<Links />
</head>
<body>
<QueryClientProvider client={queryClient}>
<WagmiProvider config={wagmiConfig}>{children}</WagmiProvider>
</QueryClientProvider>
<ScrollRestoration />
<Scripts />
</body>
</html>
);
}
export default function App() {
return <Outlet />;
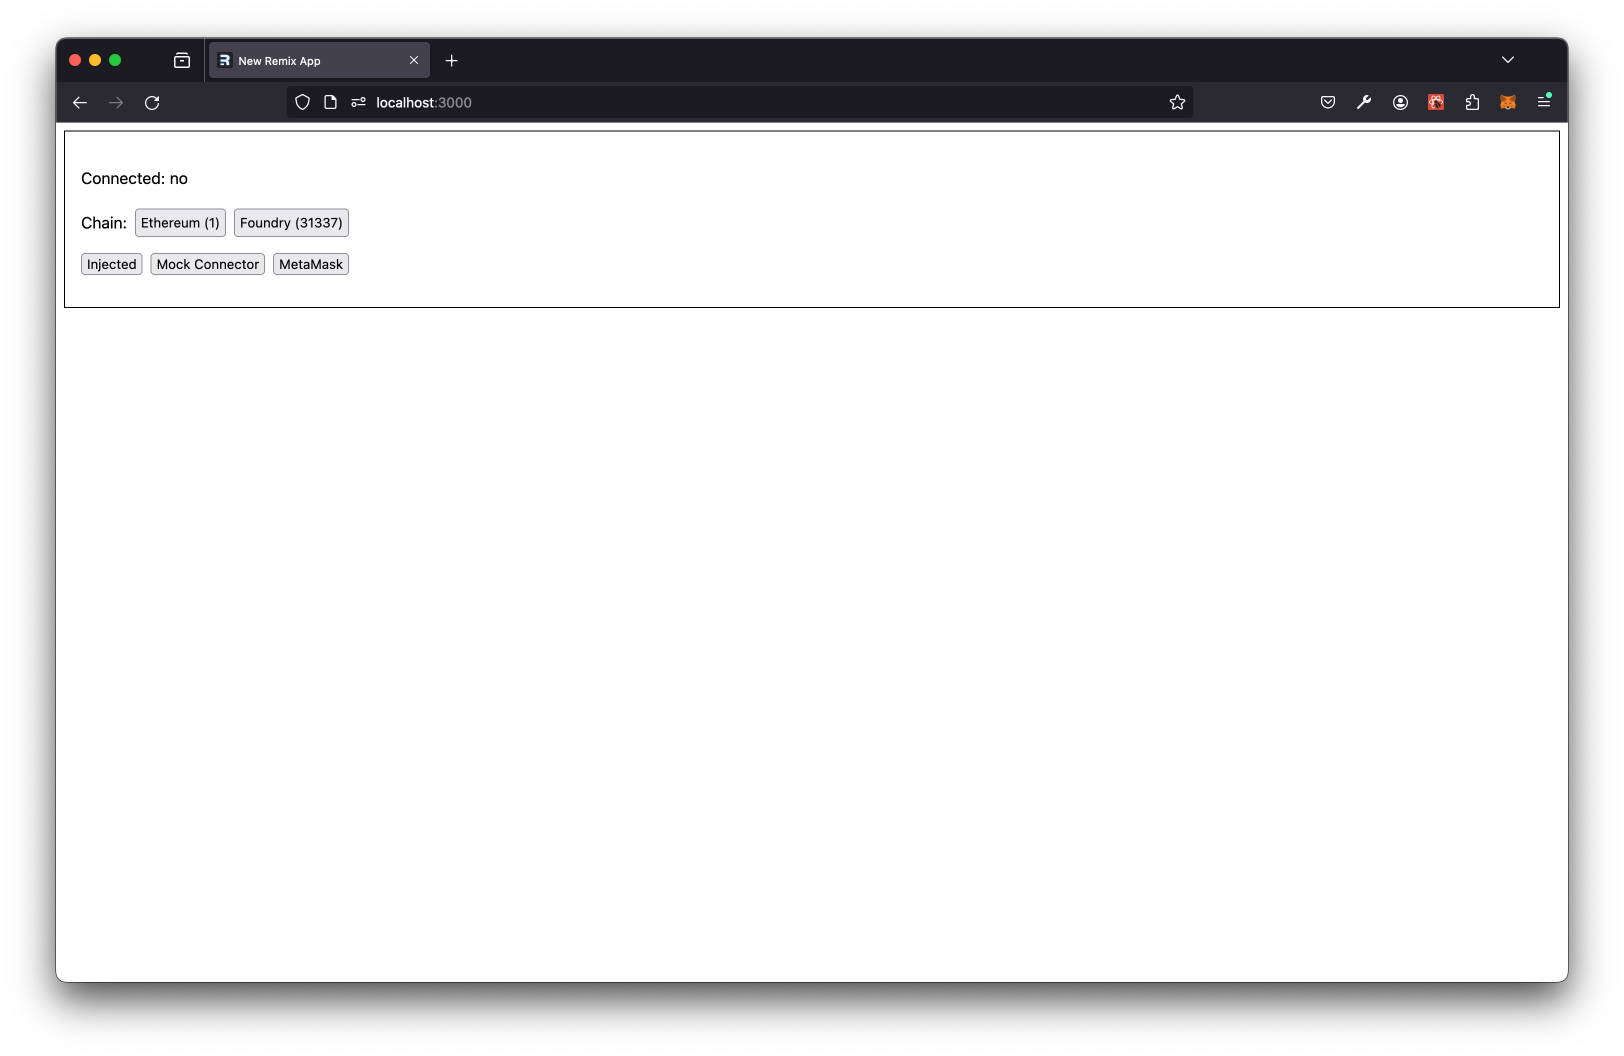
}The last thing we want to do here is actually implement some blockchain interfacing so we can connect a wallet to the application and switch chains (if required). Lets change the app/_index.tsx completely so we can:
Connect a wallet
Display the address connected
Switch chains
As we’re changing the complete file, I’m adding the complete implementation below:
// app/_index.tsx
import type { MetaFunction } from "@remix-run/node";
import {
  useAccount,
  useConnect,
  useDisconnect,
  useSwitchChain,
  useChainId,
} from "wagmi";

export const meta: MetaFunction = () => {
  return [
    { title: "New Remix App" },
    { name: "description", content: "Welcome to Remix!" },
  ];
};

export default function Index() {
  const { address, isConnected } = useAccount();
  const chainId = useChainId();
  const { connectAsync, connectors } = useConnect();
  const { disconnect } = useDisconnect();
  const { chains, switchChainAsync } = useSwitchChain();
  return (
    <div style={{ fontFamily: "system-ui, sans-serif", lineHeight: "1.8" }}>
      <div style={{ padding: 16, border: "solid 1px" }}>
        <p>Connected: {address ?? "no"}</p>

        <p style={{ display: "flex", gap: 8 }}>
          Chain:
          {chains.map((chain) => (
            <button
              key={chain.id}
              onClick={() => void switchChainAsync({ chainId: chain.id })}
              type="button"
            >
              {chain.id === chainId && "✅"} {chain.name} ({chain.id})
            </button>
          ))}
        </p>

        <p style={{ display: "flex", gap: 8 }}>
          {isConnected ? (
            <button onClick={() => disconnect()} type="button">
              Disconnect
            </button>
          ) : (
            connectors.map((connector) => (
              <button
                key={connector.id}
                onClick={() => void connectAsync({ connector })}
                type="button"
              >
                {connector.name}
              </button>
            ))
          )}
        </p>
      </div>
    </div>
  );
}
Time to see what we have so far. Make sure you have the Remix dev server (npm run dev) and anvil (anvil) running. Lets see if we can connect a browser extension wallet like MetaMask. Note that in the demo below I imported the first available anvil testing account into MetaMask. Whenever you boot up anvil, by default it provides you with 10 testing accounts and their corresponding private keys.
Finally we’re getting to the meat. When attempting to conjure up a test for connecting a wallet we get stuck. There’s no easy way to add wallet functionality to Playwright. There are projects like Synpress and Dappeteer (deprecated at the time of writing) which wrap MetaMask. Personally I’m not a fan of this approach as it’s locking you into testing on a specific wallet. Any fundamental changes to MetaMask will require changes in your tests. Any fundamental breakages in MetaMask will break your tests. Icky.
The way we like to solve this is making use of Wagmi’s mock connector. The mock connector offers a fantastic low-level abstraction for connecting a wallet to a blockchain application. You can integrate it in your application to test wallet connections and interactions. It even allows you to test non-happy paths by passing error cases to its features option. This allows you to test errors when switching chains, connecting wallets, or signing messages or transactions.
We need to initialize the mock connector. There are several ways to do this. The simplest would be to add it to our list of connectors in app/wagmi.ts. The mock connector requires one argument with a list of accounts it’s able to use. Lets limit this to the first two test accounts provided by anvil:
// app/wagmi.ts
import { createClient, http } from "viem";
import { createConfig } from "wagmi";
import { injected, mock } from "wagmi/connectors";
import { foundry, mainnet } from "wagmi/chains";

const chains = [mainnet, foundry] as const;

export const config = createConfig({
  chains,
  client: ({ chain }) => createClient({ chain, transport: http() }),
  connectors: [
    injected(),
    mock({
      accounts: [
        "0xf39Fd6e51aad88F6F4ce6aB8827279cffFb92266",
        "0x70997970C51812dc3A010C7d01b50e0d17dc79C8",
      ],
    }),
  ],
  ssr: true,
});
Yep. That adds it to our list of connectors:
And it allows us to connect with it. Woo!

Lets add a test where we connect the first account from the mock connector.
// tests/smoke.spec.ts
import { expect, test } from "@playwright/test";

test("load the homepage", async ({ page }) => {
  await page.goto("/");
  await expect(page).toHaveTitle("New Remix App");
});

test("connect wallet", async ({ page }) => {
  await page.goto("/");
  await page.getByRole("button", { name: "Mock Connector" }).click();
  await expect(
    page.getByText("Connected: 0xf39Fd6e51aad88F6F4ce6aB8827279cffFb92266")
  ).toBeVisible();
});
When we run npm test, we should be green:
> test
> playwright test


Running 2 tests using 2 workers
  2 passed (1.1s)
Yep.
The catch here is that the mock connector is initialized for everyone—regardless of environment. If we were to build and deploy this people would be able to connect with it, which could be highly confusing. We could add some logic which initializes the mock connector only on development environments by checking Vite’s import.meta.env.DEV. This is what we did for our v2 protocol application and our previous example repository.
It works great, but there’s an opportunity here to make the mock connector useful for more than just testing.
You could say that the web is quite a volatile environment. Users have different systems, different configurations, different browsers, plugins, etc. I would argue web3 is an even more volatile environment. On top of different systems and configurations, there’s a wide variety of wallet providers and an even bigger variety of tokens held in these wallets.
One of the most powerful abilities you can give yourself and your team is being able to browse an application as any user. For Endgame we set up the mock connector in a way to allow us to do precisely this.
We expose an interface which swaps our production configuration with a configuration leveraging the mock connector. This allows us to initialize a mock connection from any arbitrary account. What’s more, through this interface we can pass options into the mock connector’s features configuration to test specific scenarios. Scenario’s like connection failure, user rejections, etc.
The goals here are:
Set up a function accepting a private key/address and the mock connector’s
featuresoptions.Expose this to the browser in some way. The path of least resistance (and least intrusion into the UI) is slapping it onto
window.Set up a Playwright fixture which initializes mock connector configuration in test environments.
The trick here is having the Wagmi configuration live inside React too. Remember how we wrapped it in a useState() earlier? We can access and expose its setter.
const [wagmiConfig] = useState(config); What we need is a factory function which creates a new Wagmi configuration for us. The resulting configuration can be passed to a setWagmiConfig() state dispatcher. Because it’s part of React state, any update to this state makes parts of the application dependent on the configuration rerender automagically.
The configuration factory will need to mirror most of our general configuration. The key thing to set up is the account it will be initialized for. See the highlighted line.
// app/wagmi.ts
import { createClient, http, isAddress } from "viem";
import { privateKeyToAccount } from "viem/accounts";
import { createConfig } from "wagmi";
import { injected, mock, type MockParameters } from "wagmi/connectors";
import { foundry, mainnet } from "wagmi/chains";

const chains = [mainnet, foundry] as const;

export const config = createConfig({
  chains,
  client: ({ chain }) => createClient({ chain, transport: http() }),
  connectors: [injected()],
  ssr: true,
});

export function createMockConfig(
  addressOrPkey: `0x${string}`,
  features?: MockParameters["features"]
) {
  const account = isAddress(addressOrPkey)
    ? addressOrPkey
    : privateKeyToAccount(addressOrPkey);
  const address = typeof account === "string" ? account : account.address;
  return createConfig({
    connectors: [mock({ accounts: [address], features })],
    chains,
    client: ({ chain }) => createClient({ account, transport: http(), chain }),
    ssr: true,
  });
}
That’s the first part. The createMockConfig() function is set up to accept a private key or an address and the mock connector features configuration. By allowing any account address to be passed we can impersonate any account.
Next part is hooking this up to WagmiProvider initialization and slapping this helper onto the global window interface.
// app/root.tsx
import { QueryClientProvider, QueryClient } from "@tanstack/react-query";
import {
  Links,
  Meta,
  Outlet,
  Scripts,
  ScrollRestoration,
} from "@remix-run/react";
import { useCallback, useState } from "react";
import { WagmiProvider } from "wagmi";

import { config, createMockConfig } from "~/wagmi";

declare global {
  interface Window {
    _setupAccount: typeof createMockConfig;
  }
}

export function Layout({ children }: { children: React.ReactNode }) {
  const [queryClient] = useState(new QueryClient());
  const [wagmiConfig, setWagmiConfig] = useState(config);

  const _setupAccount = useCallback(
    (...args: Parameters<Window["_setupAccount"]>) => {
      const config = createMockConfig(...args);
      setWagmiConfig(config);
    },
    []
  );

  if (typeof window !== "undefined") window._setupAccount = _setupAccount;

  return (
    <html lang="en">
      <head>
        <meta charSet="utf-8" />
        <meta name="viewport" content="width=device-width, initial-scale=1" />
        <Meta />
        <Links />
      </head>
      <body>
        <QueryClientProvider client={queryClient}>
          <WagmiProvider config={wagmiConfig}>{children}</WagmiProvider>
        </QueryClientProvider>
        <ScrollRestoration />
        <Scripts />
      </body>
    </html>
  );
}

export default function App() {
  return <Outlet />;
}
Lets test it out.
Cool. We can now browse our app pretending to be Vitalik.
Fixtures are one of the core concepts to grok in Playwright. They’re a very powerful tool, allowing you to abstract a lot of setup and application-specific initializations and interactions into a very simple interface.
Test fixtures are used to establish the environment for each test, giving the test everything it needs and nothing else. […] With fixtures, you can group tests based on their meaning, instead of their common setup.
When testing blockchain applications there are a few things which are very useful to have set up in fixtures:
A Viem test client, extended with public- and wallet client actions.
A date mocking mechanism so we can pretend it’s earlier or later.
An account connection fixture so we don’t have to repeat this for each test.
In order to set up a Playwright fixture you want to grab test from @playwright/test and use its test.extend() method. When you export the extended test the fixture you’ve set up will be made available. In your tests, instead of importing Playwright’s test, you would import your own.
Let’s set up our first fixture. This one will concern itself with abstracting connecting a wallet through our mock connector. I’ll provide some more useful fixtures in the next section.
Lets create two files: tests/fixtures/wallet.ts and tests/fixtures/index.ts. The former will house our application-specific wallet connection initialization. The latter we’ll use as an entrypoint which re-exports anything from @playwright/test plus our extended test function.
// tests/fixtures/wallet.ts
import { type Page } from "@playwright/test";
import { type Address, type Hex } from "viem";
import { privateKeyToAccount } from "viem/accounts";
import { test as base } from "@playwright/test";
import { type MockParameters } from "wagmi/connectors";

// It helps if we give accounts names, as it makes discerning
// different accounts more clear. It's easier to talk about
// Alice and Bob in tests than "wallet starting with 0xf39...".
// NOTE: These private keys are provided by `anvil`.
const ACCOUNT_PKEYS = {
  alice: "0xac0974bec39a17e36ba4a6b4d238ff944bacb478cbed5efcae784d7bf4f2ff80",
  bob: "0x59c6995e998f97a5a0044966f0945389dc9e86dae88c7a8412f4603b6b78690d",
} as const;

// A fixture doesn't need to be a class. It could just as well
// be a POJO, function, scalar, etc. In our case a class keeps
// things nice and organized.
export class WalletFixture {
  address?: Address;
  #page: Page;

  // The only thing we require for setting up a wallet connection
  // through the mock connector is the page to look up elements.
  constructor({ page }: { page: Page }) {
    this.#page = page;
  }

  // You can make this as contrived or expansive as required for
  // your use-case. For Endgame, we actually derive accounts from
  // an `ANVIL_MNEMONIC` env with viem's `mnemonicToAccount()`.
  async connect(
    name: keyof typeof ACCOUNT_PKEYS,
    features?: MockParameters['features']
  ) {
    const pkey = ACCOUNT_PKEYS[name];
    const account = privateKeyToAccount(pkey);

    this.address = account.address;

    await this.#setup(pkey, features);
    await this.#login();
  }

  // Any application-specific rituals to get a wallet connected
  // can be put here. In our demo app we click a button.
  async #login() {
    await this.#page.getByRole("button", { name: "Mock Connector" }).click();
  }

  // Remember how we slapped our mock configuration helper onto
  // `window._setupAccount`? Here's how to use it in Playwright:
  async #setup(...args: [Hex, MockParameters["features"]]) {
    // We let Playwright wait for the function to be non-nullable
    // on the `window` global. This ensures we can use it.
    await this.#page.waitForFunction(() => window._setupAccount);
    // `page.evaluate()` is a _very_ powerful method which allows
    // you to evaluate a script inside the browser page context.
    // In this example, we evaluate `window._setupAccount()`
    // with arguments passed from inside Playwright tests.
    await this.#page.evaluate((args) => window._setupAccount(...args), args);
  }
}

// Lastly, we export a `test` with the `WalletFixture` attached.
export const test = base.extend<{ wallet: WalletFixture }>({
  async wallet({ page }, use) {
    await use(new WalletFixture({ page }));
  },
});
The second file we’ll create is tests/fixtures/index.ts which will be a central module making fixtures and any other Playwright exports available to our tests:
// tests/fixtures/index.ts
import { mergeTests } from "@playwright/test";

import { test as walletTest } from "./wallet";

// Re-export anything from Playwright.
export * from "@playwright/test";
// Export our test function, extended with fixtures.
// It'll become useful when we have more fixtures to attach.
export const test = mergeTests(walletTest);
Now we can update our tests/smoke.spec.ts file to make use of this fixture:
// tests/smoke.spec.ts
// Notice how we're importing from './fixtures' now.
import { expect, test } from "./fixtures";
import { UserRejectedRequestError } from "viem";

test("load the homepage", async ({ page }) => {
  await page.goto("/");
  await expect(page).toHaveTitle("New Remix App");
});

test("connect wallet", async ({ page, wallet }) => {
  await page.goto("/");
  await wallet.connect("alice");
  await expect(page.getByText(`Connected: ${wallet.address}`)).toBeVisible();
});

test("throw when wallet connect failure", async ({ page, wallet }) => {
  await page.goto("/");
  await Promise.all([
    page.waitForEvent(
      "pageerror",
      (error) => error.name === "UserRejectedRequestError"
    ),
    wallet.connect("alice", {
      connectError: new UserRejectedRequestError(
        new Error("Connection failure.")
      ),
    }),
  ]);
});
Make sure you have the Remix dev server and anvil node running. Then, npm test
> test
> playwright test


Running 3 tests using 3 workers
  3 passed (1.5s)
Amazing.
With Endgame parts of our core functionality depend on time elapsed. Primarily, any rental has a rent duration which, well, dictates the amount of seconds a rental will be considered being actively rented. In order to test the temporal aspects of the protocol we need to travel forwards in time. This way, when a rental has “expired”, we can test functionality related to stopping rentals.
This kind of sucks, because we need to synchronize multiple time sources to reflect the same time. At the very least the chain’s block timestamp and the browser’s date.
In this bonus round we’ll implement a few Playwright fixtures which enables us to 1) mock the browser’s Date initializer and 2) synchronize our test RPC node so that the latest block timestamp reflects the same time.
First, lets add something to our UI so we can verify.
// app/_index.tsx
import type { MetaFunction } from "@remix-run/node";
import {
  useAccount,
  useConnect,
  useDisconnect,
  useBlock,
  useSwitchChain,
  useChainId,
} from "wagmi";

export const meta: MetaFunction = () => {
  return [
    { title: "New Remix App" },
    { name: "description", content: "Welcome to Remix!" },
  ];
};

export default function Index() {
  const { address, isConnected } = useAccount();
  const chainId = useChainId();
  const { connectAsync, connectors } = useConnect();
  const { disconnect } = useDisconnect();
  const { chains, switchChainAsync } = useSwitchChain();

  const { data: block } = useBlock();
  const blockTime = new Date(Number(block?.timestamp) * 1000).toUTCString();
  const browserTime = new Date().toUTCString();

  return (
    <div style={{ fontFamily: "system-ui, sans-serif", lineHeight: "1.8" }}>
      <div style={{ padding: 16, marginBottom: 16, border: "solid 1px" }}>
        <p>Block time: {blockTime}</p>
        <p>Browser time: {browserTime}</p>
      </div>

      <div style={{ padding: 16, border: "solid 1px" }}>
        <p>Connected: {address ?? "no"}</p>

        <p style={{ display: "flex", gap: 8 }}>
          Chain:
          {chains.map((chain) => (
            <button
              key={chain.id}
              onClick={() => void switchChainAsync({ chainId: chain.id })}
              type="button"
            >
              {chain.id === chainId && "✅"} {chain.name} ({chain.id})
            </button>
          ))}
        </p>

        <p style={{ display: "flex", gap: 8 }}>
          {isConnected ? (
            <button onClick={() => disconnect()} type="button">
              Disconnect
            </button>
          ) : (
            connectors.map((connector) => (
              <button
                key={connector.id}
                onClick={() => void connectAsync({ connector })}
                type="button"
              >
                {connector.name}
              </button>
            ))
          )}
        </p>
      </div>
    </div>
  );
}
The result will look something like the screenshot below. When you boot up a new anvil instance these times will roughly correlate, but after a little while—refresh the page or force a rerender—these times will diverge more and more. Also note that blockTime relates to the currently selected chain. Switching between Ethereum and Foundry will reflect the latest block time on these respective chains.

It’s high time (ha!) to add some tooling to sync these up. We will create two more fixtures. One responsible for interfacing with anvil and another responsible for patching the Date constructor browser-side.
First up the anvil fixture:
// tests/fixtures/anvil.ts
import { test as base } from "@playwright/test";
import { createTestClient, http, publicActions, walletActions } from "viem";
import { foundry } from "viem/chains";

const anvil = createTestClient({
  chain: foundry,
  mode: "anvil",
  transport: http(),
})
  .extend(publicActions)
  .extend(walletActions)
  // `client.extend()` is a very low-barrier utility, allowing you
  // to write custom methods for a viem client easily. It receives
  // a callback with the `client` as argument, returning an object
  // with any properties or methods you want to tack on.
  // We return an object with an `async syncDate(date)` method.
  .extend((client) => ({
    async syncDate(date: Date) {
      await client.setNextBlockTimestamp({
        // NOTE: JavaScript Date.getTime returns milliseconds.
        timestamp: BigInt(Math.round(date.getTime() / 1000)),
      });
      // We need to mine a block to commit its next timestamp.
      return client.mine({ blocks: 1 });
    },
  }));

export const test = base.extend<{ anvil: typeof anvil }>({
  async anvil({}, use) {
    await use(anvil);
  },
});
Having an anvil fixture is generally useful as it allows you to query and interact with the test node inside of your tests.
The most pragmatic way to approach synchronizing date sources is to have the browser synchronize with block time. Flipping this approach—syncing a testnet node to the current system time—could be the better approach but aving block time be leading yields less and simpler code in the fixture.
We’re going to write a date fixture which will make use of our anvil fixture. In this date fixture we can use the anvil client to fetch the block time to synchronize the browser on. We will add two methods:
addDays(n)which will advance the currentdatenamount of days.set(date)which will attempt to synchronize the block timestamp and browserDateconstructor with the passeddate.
Note the line which imports test from our ./anvil fixture.
// tests/fixtures/date.ts
import { test as base } from "./anvil";

export const test = base.extend<{
  date: {
    addDays: (days: number) => Promise<Date>;
    set: (value: number | string | Date) => Promise<Date>;
  };
}>({
  async date({ anvil, page }, use) {
    // We want to keep around a cached reference to be used
    // by `addDays()` as opposed to getting the current date
    // anew each time we call `addDays()`.
    let date = new Date();

    async function addDays(days: number) {
      date = new Date(date.setDate(date.getDate() + days));
      await set(date);
    }

    async function set(value: number | string | Date) {
      date = new Date(value);

      // Attempt to synchronize our test node's block timestamp
      // with the provided `date`. We can't set dates in the past
      // or at the current time: it will throw a Timestamp error.
      try {
        await anvil.syncDate(date);
      } catch (error) {
        console.error(error);
      }

      // Construct our patch to `window.Date`. Yes. We're
      // patching a global. Unfortunately this will mean React
      // will throw hydration warnings, but it will allow us
      // to test with mocked dates regardless.
      const dateInit = date.valueOf();
      const datePatch = `
      Date = class extends Date {
        constructor(...args) {
          super(...args.length ? args : [${dateInit}]);
        }

        now() {
          return super.now() + (${dateInit} - super.now());
        }
      };
      `;

      // Firstly we'll attach it as a `<script>` to the page
      // in Playwright. Whenever you `goto()` or `reload()` in
      // Playwright, the Date patch will be applied.
      await page.addInitScript(datePatch);
      // Secondly, we evaluate the script directly within the
      // Playwright page context. Roughly this should allow us
      // to forgo any `goto()` or `reload()`—assuming any
      // component sensitive to `Date` is rerendered before
      // doing your test assertions.
      await page.evaluate((datePatch) => {
        // Look, mom! A valid use of `eval()`!
        // eslint-disable-next-line no-eval
        eval(datePatch);
      }, datePatch);

      return date;
    }

    await use({ addDays, set });
  },
});
One more thing…
We can update our tests/fixtures/index.ts file to chuck all our created fixtures onto a single test() function.
// tests/fixtures/index.ts
import { mergeTests } from "@playwright/test";

import { test as anvilTest } from "./anvil";
import { test as dateTest } from "./date";
import { test as walletTest } from "./wallet";

export * from "@playwright/test";
export const test = mergeTests(anvilTest, dateTest, walletTest);
We’re able to time travel now! Only forwards though.
Lets try it out and add a test.
// tests/smoke.spec.ts
import { expect, test } from "./fixtures";
import { UserRejectedRequestError } from "viem";

test("load the homepage", async ({ page }) => {
  await page.goto("/");
  await expect(page).toHaveTitle("New Remix App");
});

test("connect wallet", async ({ page, wallet }) => {
  await page.goto("/");
  await wallet.connect("alice");
  await expect(page.getByText(`Connected: ${wallet.address}`)).toBeVisible();
});

test("throw when wallet connect failure", async ({ page, wallet }) => {
  await page.goto("/");
  const [error] = await Promise.all([
    page.waitForEvent("pageerror"),
    wallet.connect("alice", {
      connectError: new UserRejectedRequestError(
        new Error("Connection failure.")
      ),
    }),
  ]);
  expect(error.name).toBe("UserRejectedRequestError");
});

test("synchronize times", async ({ date, page }) => {
  await date.set("2069-04-20");
  await page.goto("/");
  await page.getByRole("button", { name: /Foundry/ }).click();
  await expect(page.getByText(/Block time/)).toHaveText(/Sat, 20 Apr 2069/);
  await expect(page.getByText(/Browser time/)).toHaveText(/Sat, 20 Apr 2069/);
  await date.addDays(69420);
  // Because our demo app doesn't rerender after patching the
  // Date constructor we need a `goto()` or `reload()`.
  await page.reload();
  await expect(page.getByText(/Block time/)).toHaveText(/Sun, 15 May 2259/);
  await expect(page.getByText(/Browser time/)).toHaveText(/Sun, 15 May 2259/);
});
When you run npm test again, we should get 4 passed tests now. Running this command a second time however makes the "synchronize times" test fail. If you read the code in our date fixture carefully you may know why: we can’t set the time of our local testnet node to a date in the past. Only forwards.
The solution here is making a snapshot of our chain state before our tests fire and restore this snapshot after all tests are finished. We can leverage our anvil fixture for this.
// tests/smoke.spec.ts
import { expect, test } from "./fixtures";
import { UserRejectedRequestError } from "viem";

let id: `0x${string}` | undefined;

test.beforeAll(async ({ anvil }) => {
  id = await anvil.snapshot();
});

test.afterAll(async ({ anvil }) => {
  if (!id) return;
  await anvil.revert({ id });
  id = undefined;
});

test("load the homepage", async ({ page }) => {
  await page.goto("/");
  await expect(page).toHaveTitle("New Remix App");
});

test("connect wallet", async ({ page, wallet }) => {
  await page.goto("/");
  await wallet.connect("alice");
  await expect(page.getByText(`Connected: ${wallet.address}`)).toBeVisible();
});

test("throw when wallet connect failure", async ({ page, wallet }) => {
  await page.goto("/");
  const [error] = await Promise.all([
    page.waitForEvent("pageerror"),
    wallet.connect("alice", {
      connectError: new UserRejectedRequestError(
        new Error("Connection failure.")
      ),
    }),
  ]);
  expect(error.name).toBe("UserRejectedRequestError");
});

test("synchronize times", async ({ date, page }) => {
  await date.set("2069-04-20");
  await page.goto("/");
  await page.getByRole("button", { name: /Foundry/ }).click();
  await expect(page.getByText(/Block time/)).toHaveText(/Sat, 20 Apr 2069/);
  await expect(page.getByText(/Browser time/)).toHaveText(/Sat, 20 Apr 2069/);
  await date.addDays(69420);
  await page.reload();
  await expect(page.getByText(/Block time/)).toHaveText(/Sun, 15 May 2259/);
  await expect(page.getByText(/Browser time/)).toHaveText(/Sun, 15 May 2259/);
});
Reboot your anvil node. Now you should be able to spam npm test as many times as you like—assuming you set fullyParallel: false in you playwright.config.ts.
Time to add a cherry on top.
Maybe you caught the fact that the Playwright configuration has a webServer option. The cool thing about webServer is that it can be leveraged as a poor-man’s service orchestration. webServer can be turned into an array of webServer entries, meaning we can add our anvil initialization here as well.
// playwright.config.ts
  webServer: [
    {
      command: "anvil",
      url: "http://127.0.0.1:8545",
      reuseExistingServer: !process.env.CI,
    },
    {
      command: "npm run start",
      url: "http://127.0.0.1:3000",
      reuseExistingServer: !process.env.CI,
    },
  ],
Check it out.
Woah. This was quite the trip. I hope this walkthrough is helpful for some of you. It was definitely fun to write. I also hope the peak behind the curtain on how we approached testing challenges for Endgame is as enjoyable to read as it is to share.
Be sure to check out the example repository, which should be straightforward to get up and running. I think it’s a decent web3 front end development springboard. The commits to the repository roughly corroborate to each of the sections in this walkthrough.
If you have any questions or remarks, be sure to hit me up on X.
Note: This article is co-published on rombrom.com.
