
Introduction
Blockscout is one of the most popular block explorers in the blockchain world. More than +800 networks are using this product to help users and programmers interact deeply with the information available on their networks. This is because Blockscout team offers a user-friendly interface, helps projects save costs, and provides industry-leading support. Additionally, the fact that they regularly add useful features such as the Ethereum Name Service explorer feature and the Dappscout dApp market makes Blockscout always one of the top choices when projects build their infrastructure. The recently added feature to check blobs is a clear example. Blob is a new concept that refers to data storage units helping Ethereum execute transactions with stable and cheaper fees. Blockscout lets users view blob data on blockchains, which is a fundamental need. In this article, we will learn how to view blob data right on Blockscout’s block explorer.
The Importance of Blobs, Explained
Scaling (or expansion) is still an eternal problem for blockchains currently. Poor scalability has created paradoxes that inhibit the development of blockchains. The first is that transaction fees on layer 2 blockchains, which are responsible for expanding the Ethereum mainnet, are sky-high and are increasingly reaching transaction fees on the main network. The other paradox is that when the number of users and total assets locked (TVL) are low, the transaction costs are extremely affordable. On the other hand, when the number of users increases and liquidity is good, transaction costs become too expensive. This led to the birth of an important Ethereum community proposal called EIP-4844 (also known as Proto-Danksharding or Dencun upgrade). This upgrade targets layer 2 Rollups and is a smaller version of the Danksharding method, a method of breaking data into data packets of a maximum size of 131,072 bytes called blobs to be processed instead of processing large amounts of information at once using the calldata command. While Proto-Danksharding only allows processing 1 blob per block, Danksharding will allow processing up to 64 blobs per block. In particular, each blob can contain up to 6 transactions.
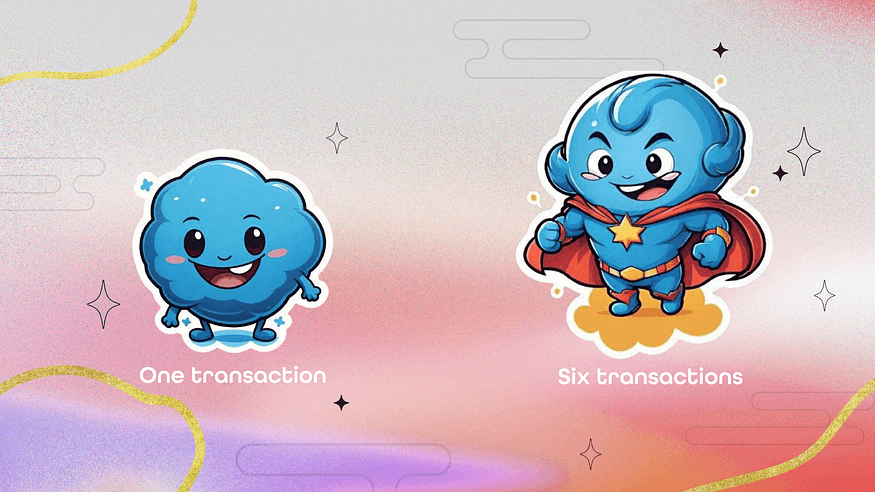
EIP-4844 has proven effective as transaction fees on Rollups layers were significantly reduced. Transaction fees have dropped sharply on blockchains like Optimism, Zora, or Base. On blockchains that use Zero Knowledge Rollups (ZK Rollups) technology such as zkSync and Starknet, those fees are reduced even more, possibly hundreds of times.
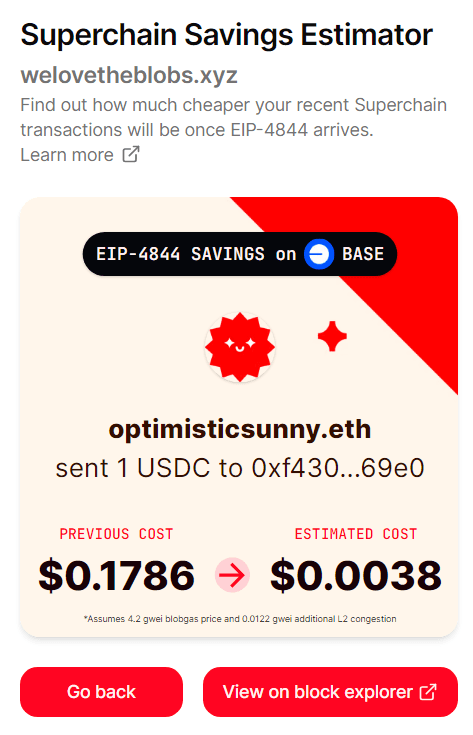
Estimated fees on Base Network before and after Dencun upgrade (https://welovetheblobs.xyz/)
Blob is not only designed to reduce costs for users and applications but also to reduce the cost of running the blockchain. Blobs are stored on the Beacon Chain and are destroyed after 2 weeks of existence to save disk space. However, this makes it difficult for those who need to analyze the blob’s data. Luckily, this is where Blockscout becomes an essential tool.
How to View Blobs on Blockscout
Blockscout now makes it possible to view blob data, even though they disappear two weeks after creation, on several blockchains such as Ethereum, Sepolia, Holesky, Gnosis, and Chiado.
To guide you, Ethereum Mainnet Explorer will be taken as an example.
First, visit https://eth.blockscout.com/ and go to Blockchain → Blocks in the leftmost menu. You will easily see it because Blockscout’s interface is very easy to use.
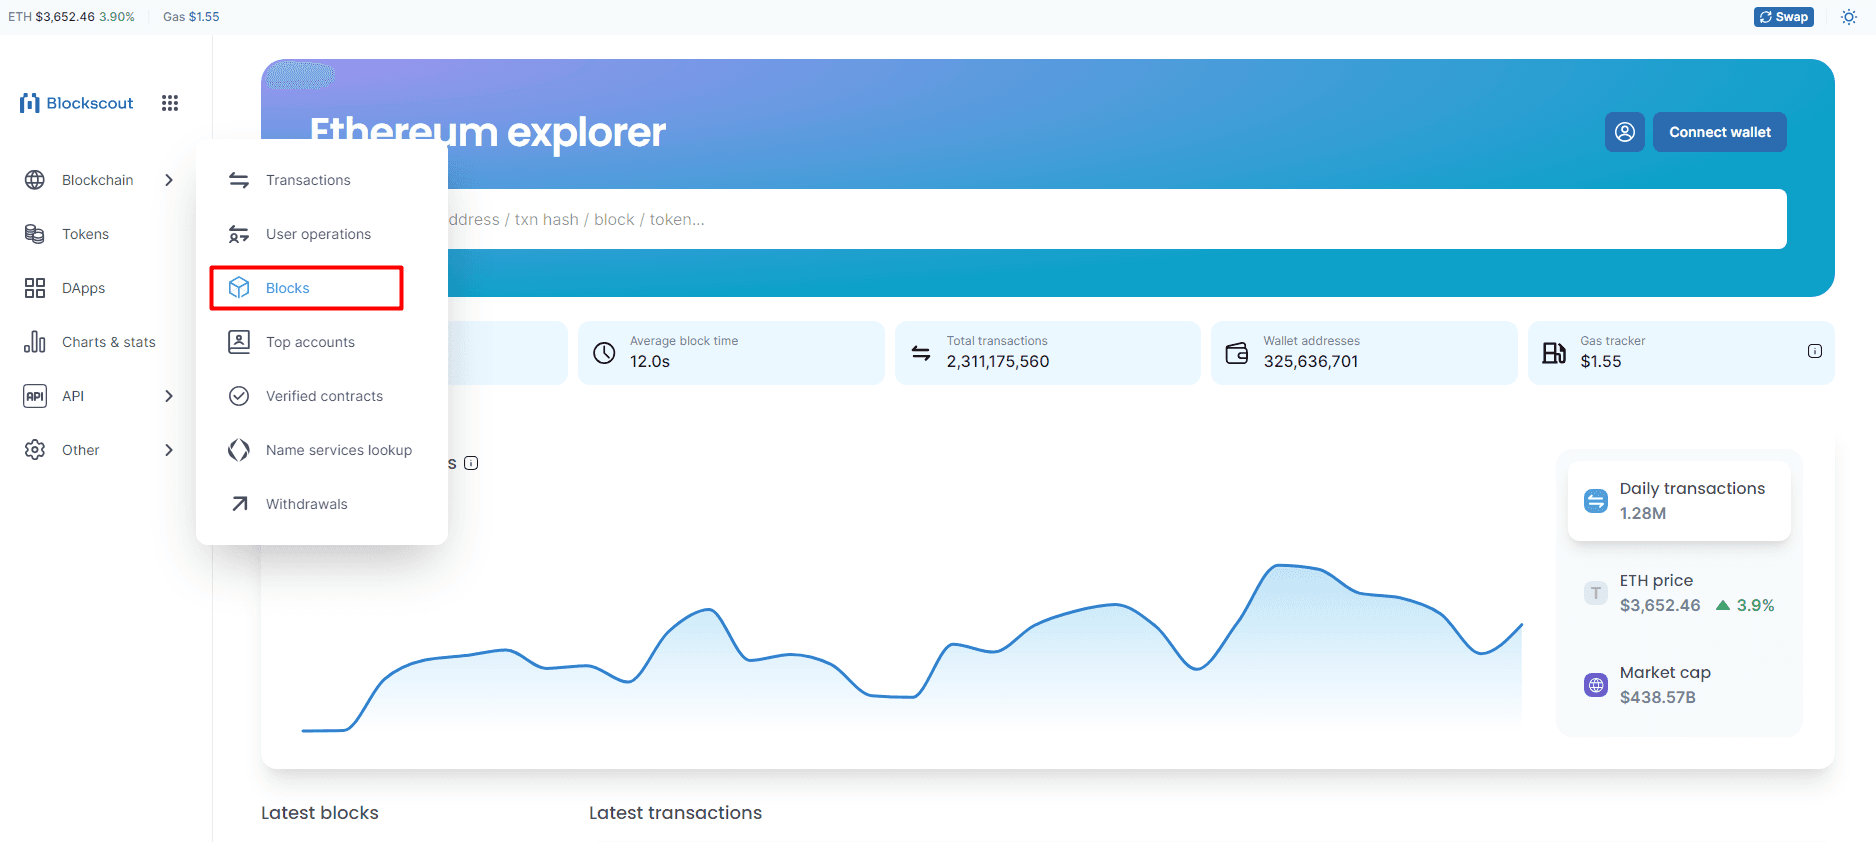
Once on the block information page https://eth.blockscout.com/blocks, go to any block to see if that block is attached to a blob. You will see the text “1 blob txn” which you can click to view the transactions attached to that blob.
For example, we will look at block #19517675 and will see that this is a block with a blob transaction attached.
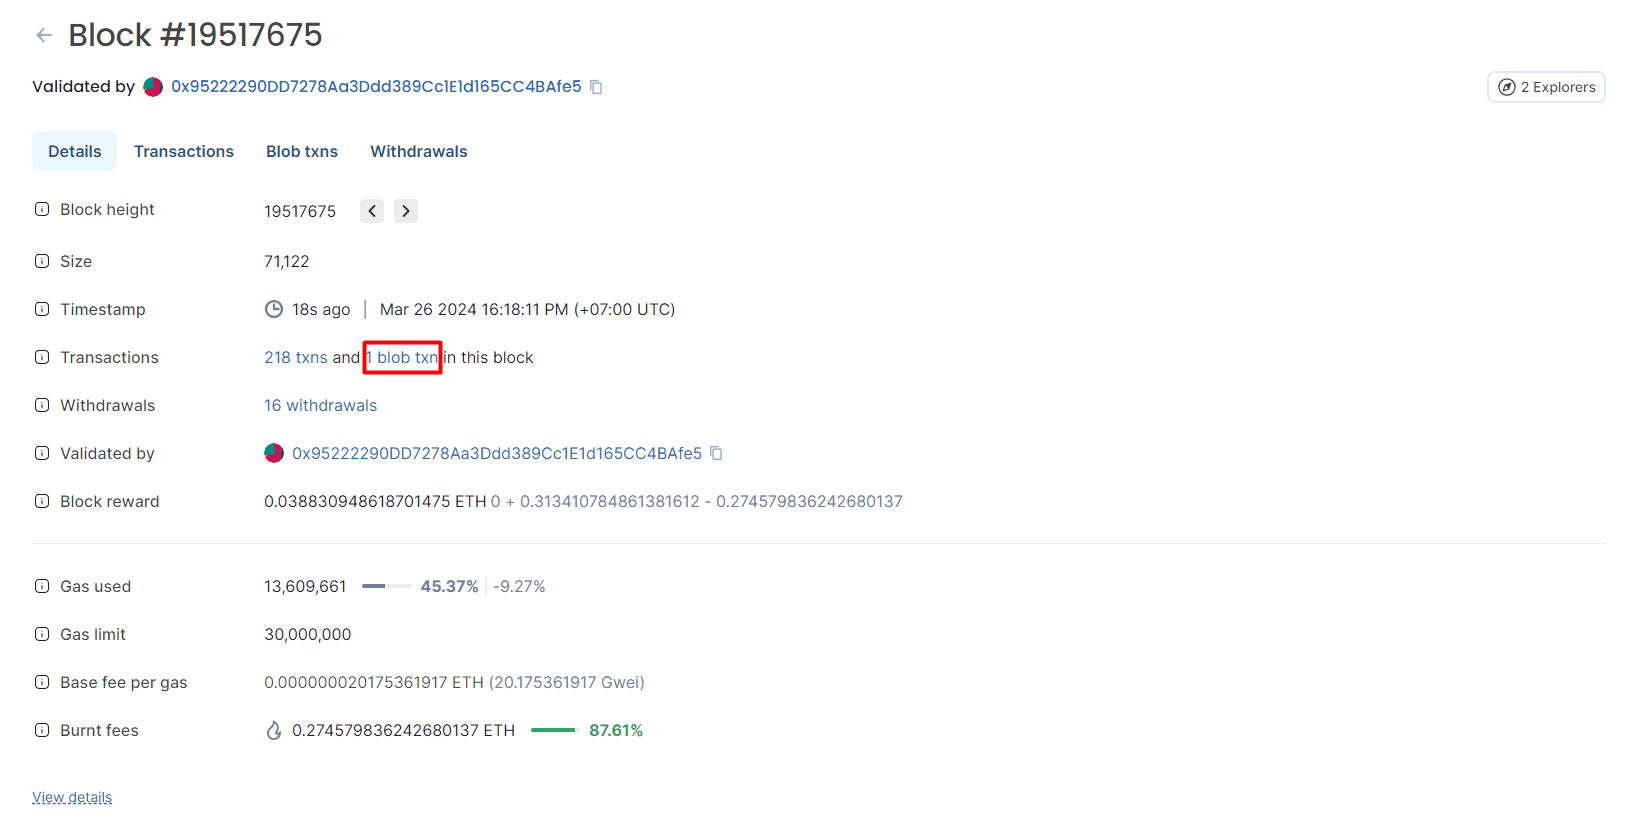
Try clicking “1 blob txn” to see a summary of this blob transaction!

As you can see, Blockscout has many useful tags for users, successful transaction tags, failed transactions, EOA wallet, contract, etc. Blob txn is the latest tag added, making identifying these transactions even simpler. Now to see even more information, click on the Txn Hash of this transaction to take a closer look at information such as the amount of fees paid or the amount of gas burned.
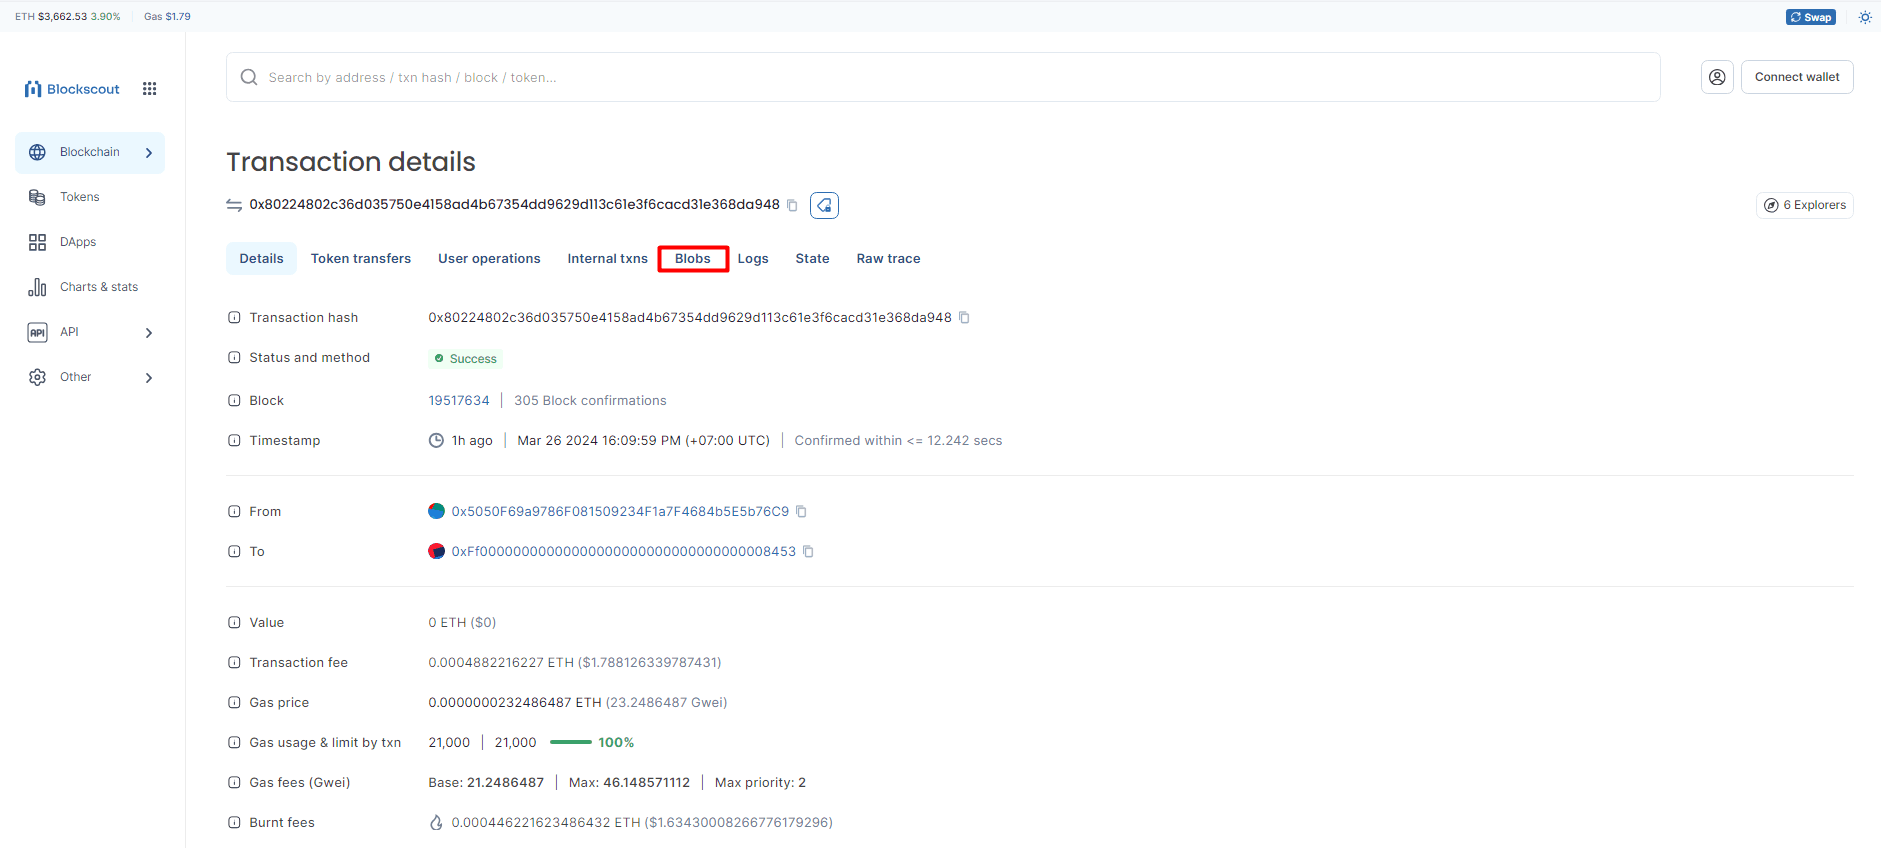
If you click on the Blobs, you will see all the hashes in that blob.
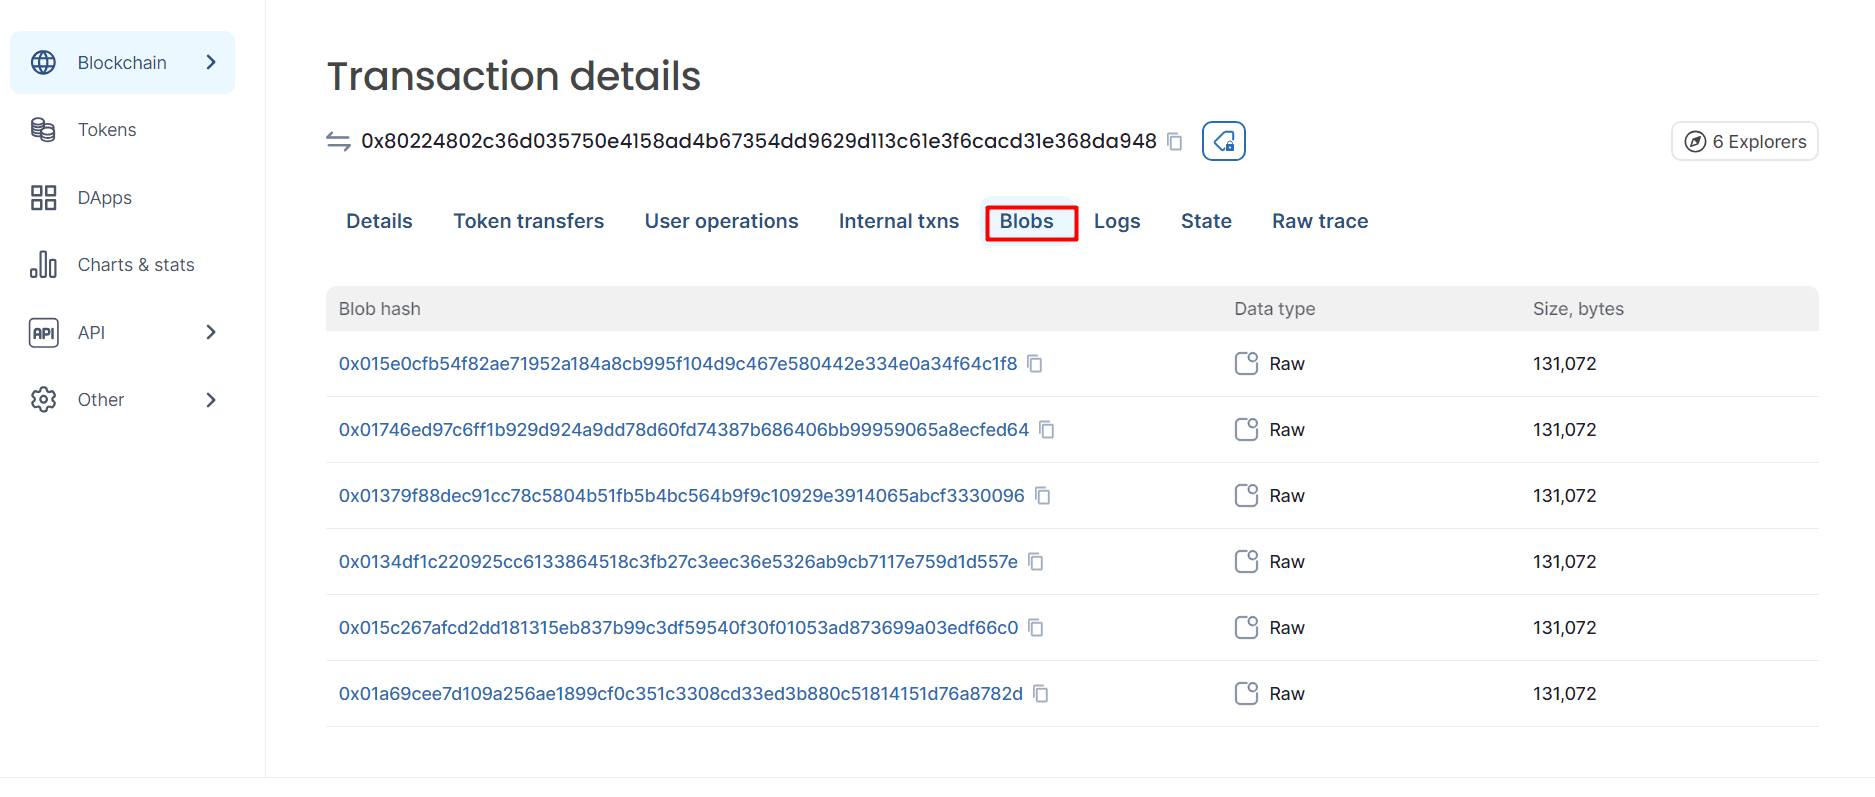
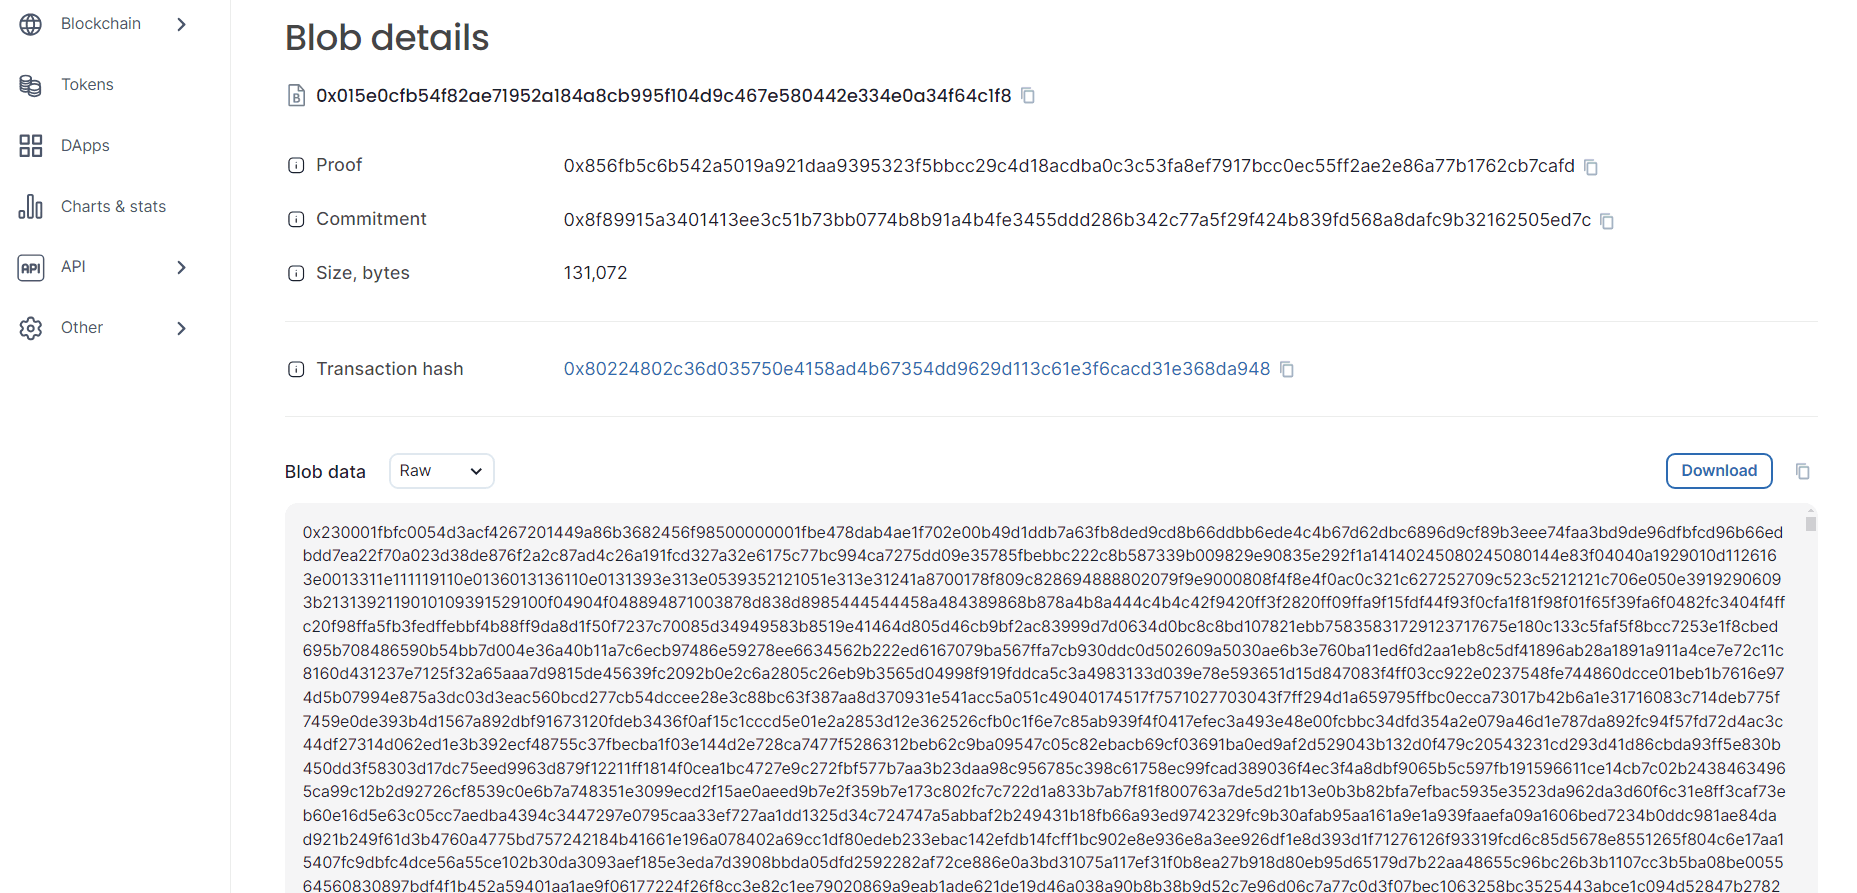
If you click on any hash, you can view the data of that hash.
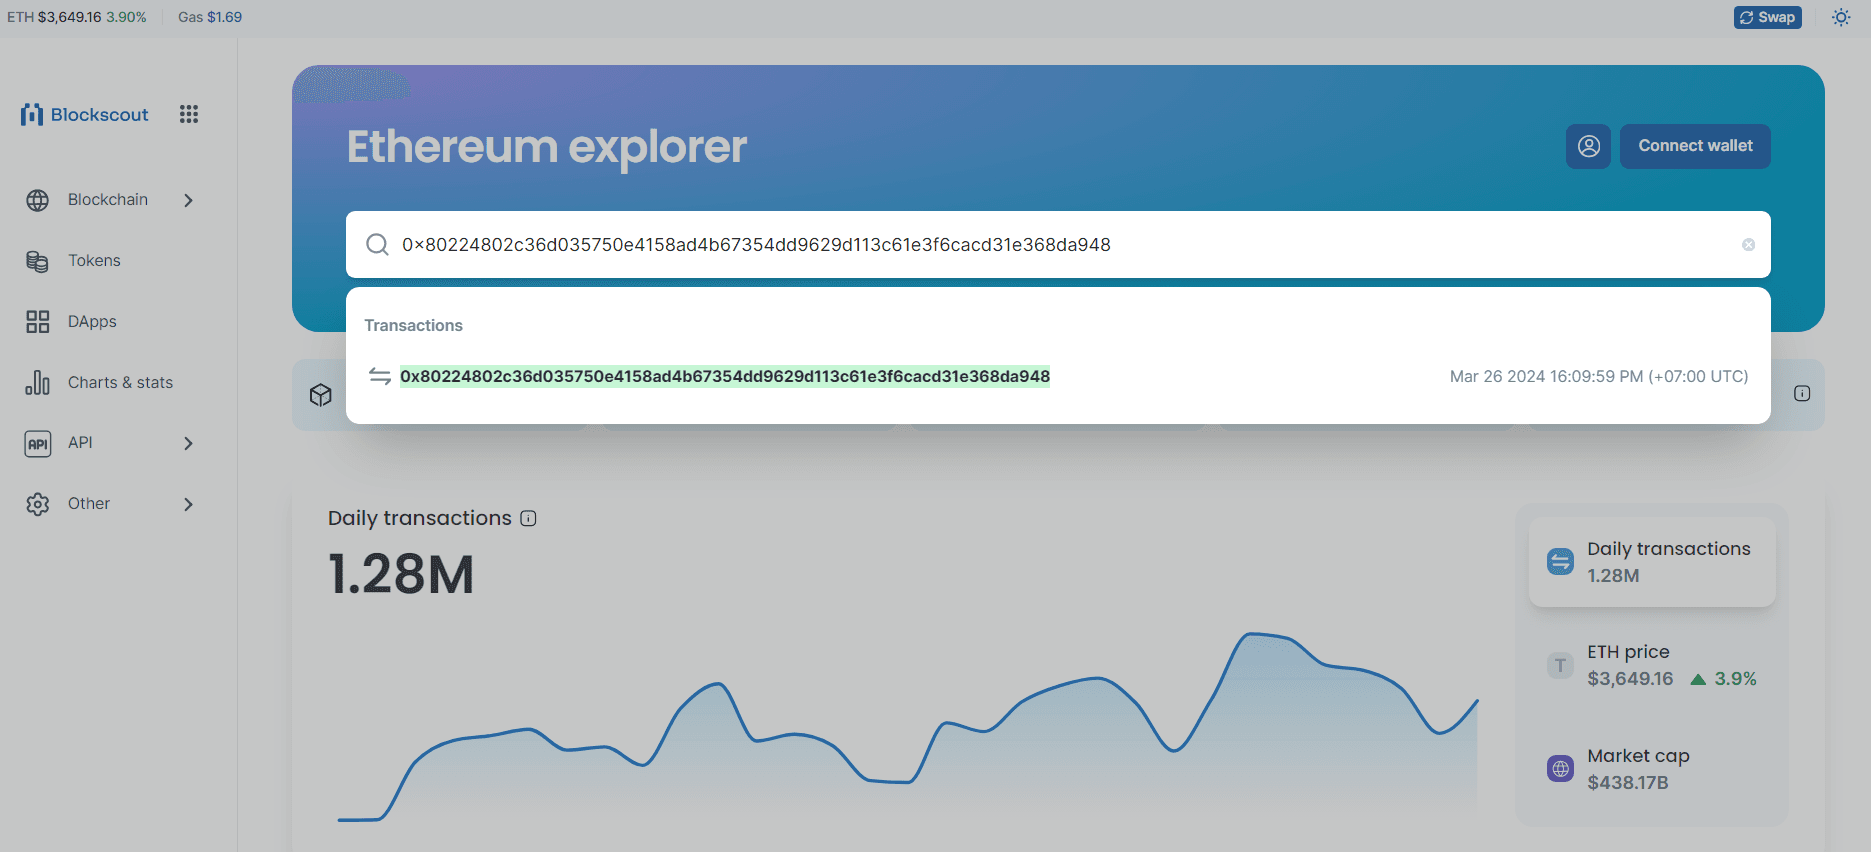
If you have the link to the blob transaction, you can enter it directly into the search box on the home page to go to the “Transaction details” transaction page as above.
An interesting fact is that anyone can create blobs with all types of formats such as text, images, clips, not just RAW data. Programmers have created a website to show users that: https://blob.fm/
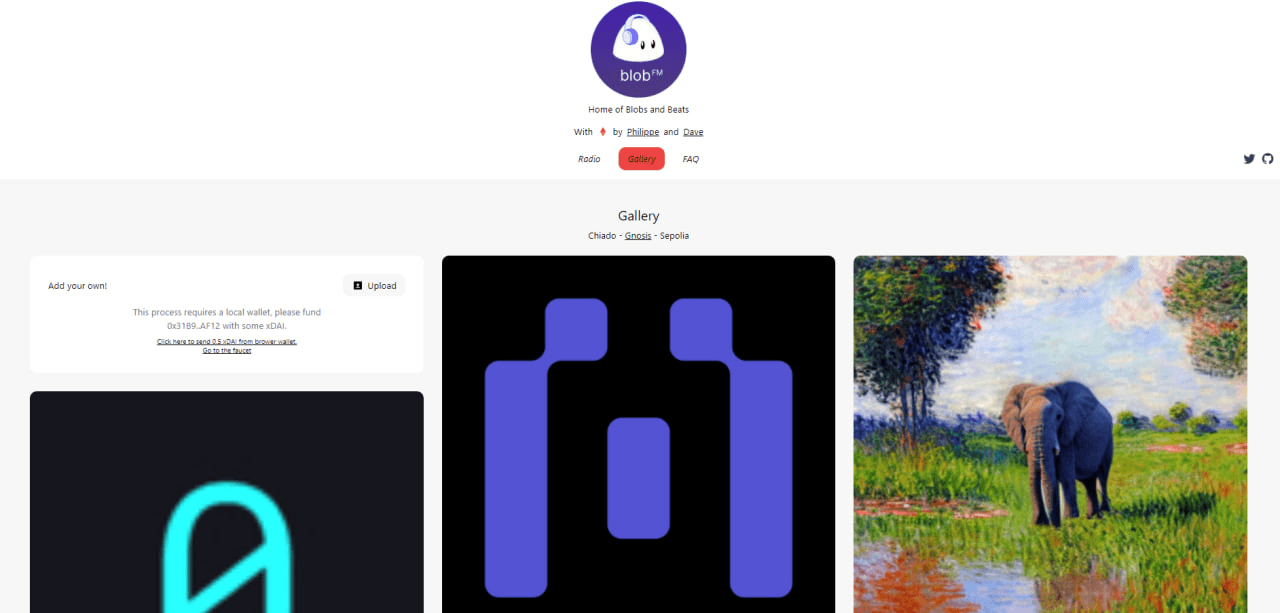
Once you’ve posted your blob, you can check Blockscout to see the information contained in that blob.
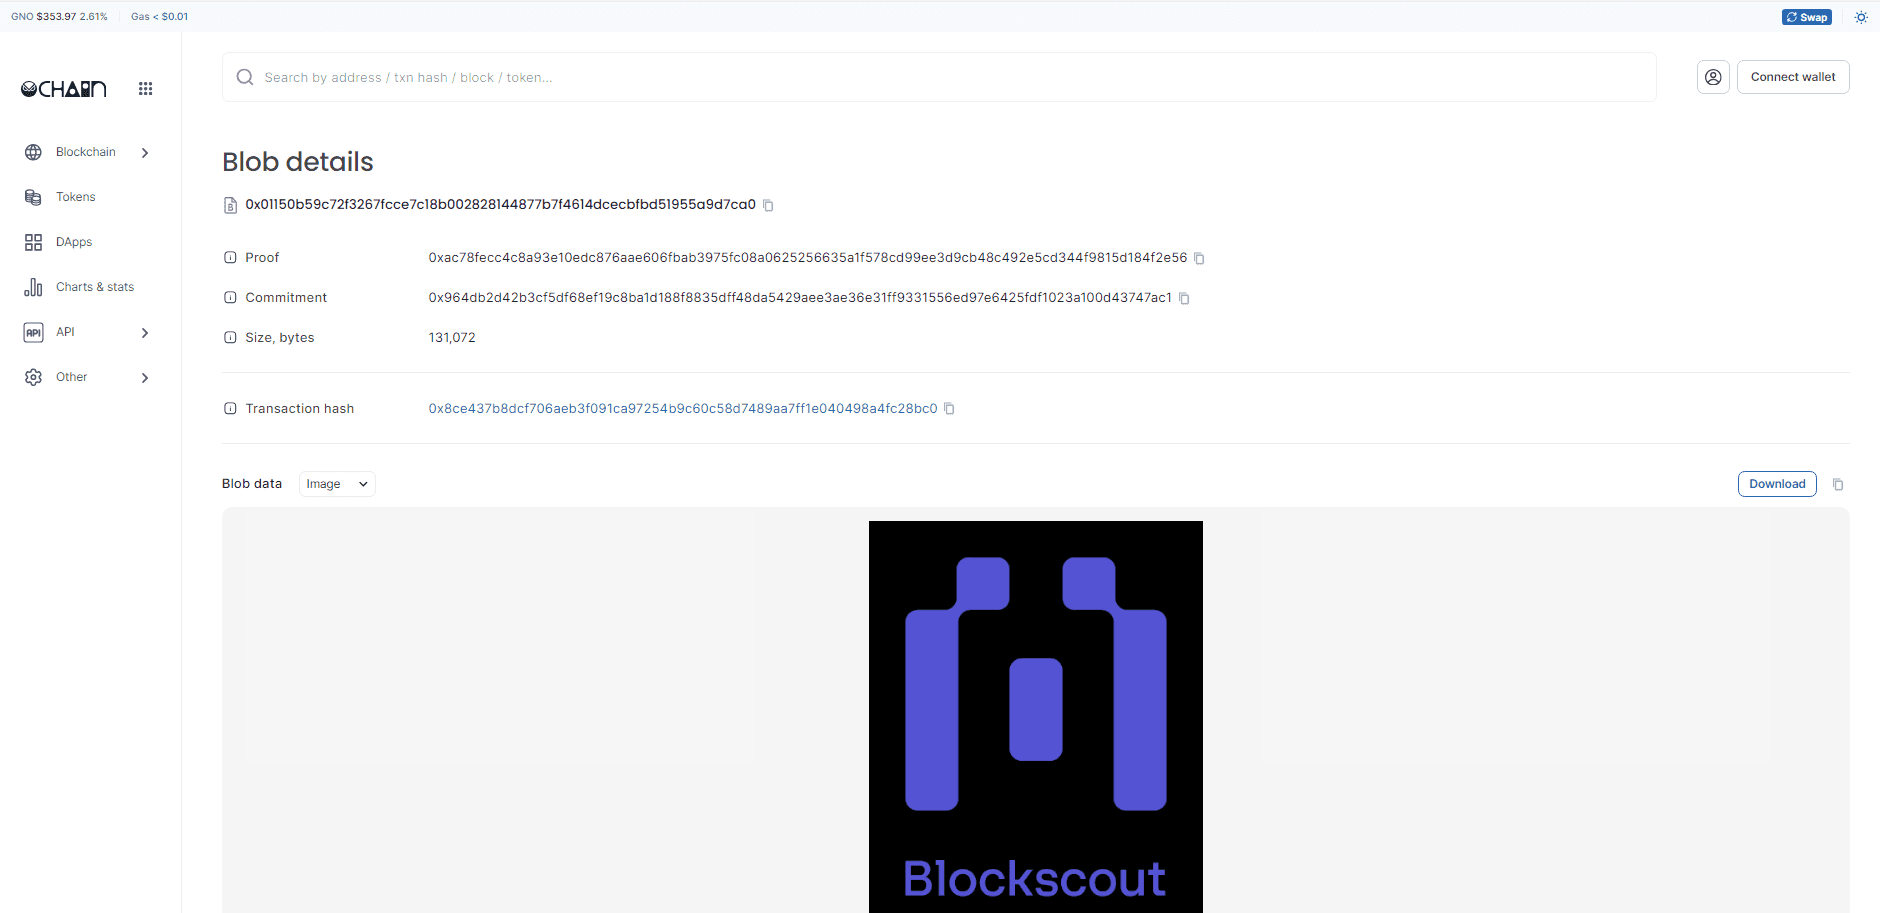
Try entering this hash: 0x8ce437b8dcf706aeb3f091ca97254b9c60c58d7489aa7ff1e040498a4fc28bc0 into https://gnosis.blockscout.com/ and follow the steps above to see the image below!

Conclusion
Blockscout is a powerful and easy-to-use tool for blockchain exploration. The integration of the blob explore feature makes Blockscout more useful than ever, allowing users and developers to track blob data, even after it is no longer stored on the Beacon Chain. To learn more about blobs, visit supported explorers like Ethereum, Sepolia, Holesky, Gnosis, and Chiado. If you want to build a block explorer for your blockchains, visit https://www.blockscout.com/ now!