Step 1: Navigate Deploy Section
To begin with, go to the correct “Deploy” page by clicking on the “Deploy” button.
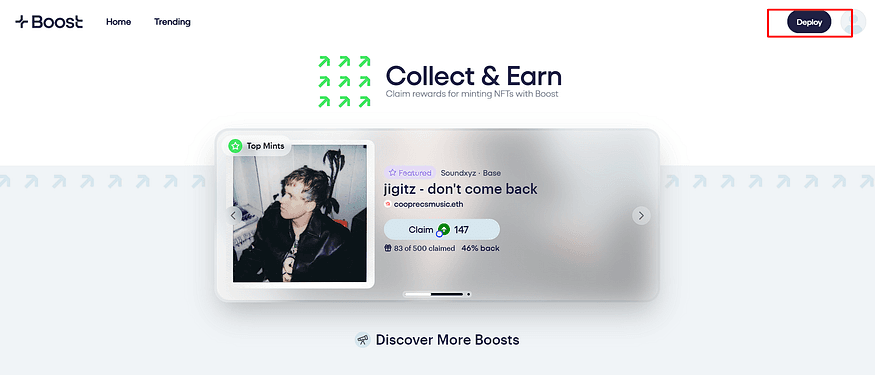
Or else, go directly to https://boost.xyz/deploy. The interface will look like below 👇
Step 2: Configure Your Boost
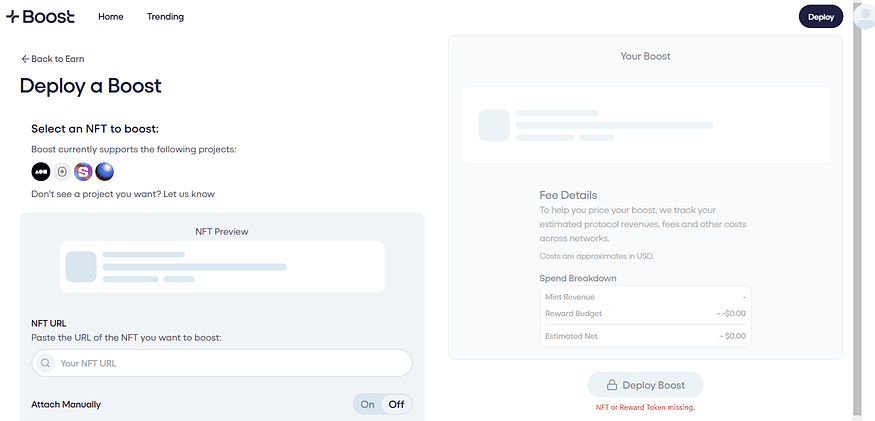
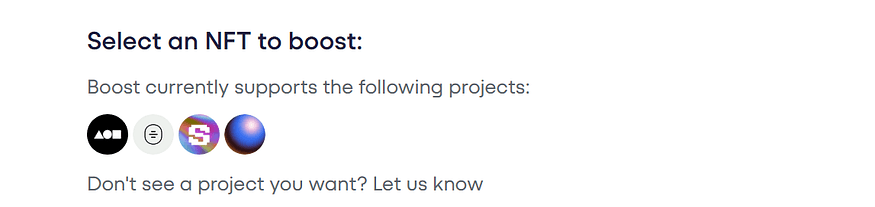
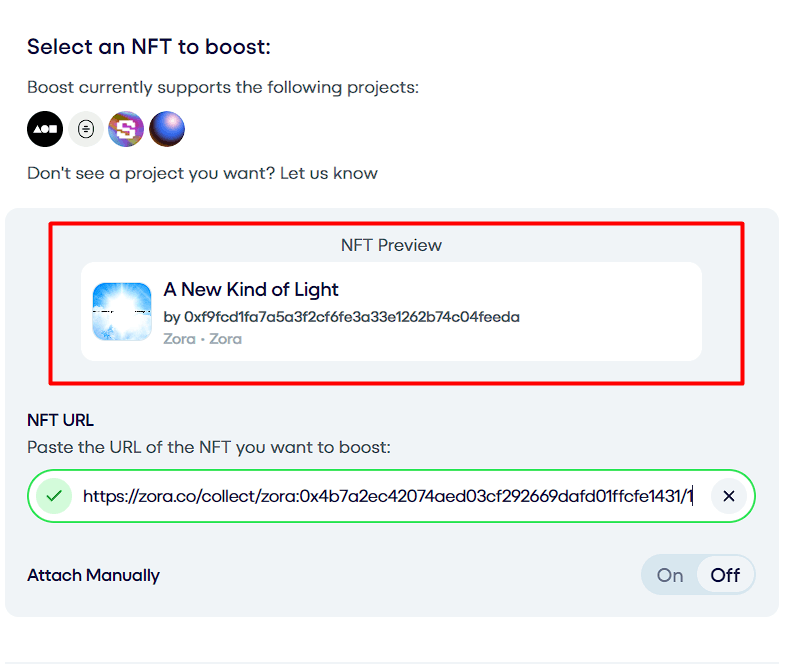
As you can see on the screen, only the contents (NFTs) are from Foundation, Pods, Sound, and Zora.
Input NFT details
You should copy the link of the NFT content you want to boost then paste the link into the box below.
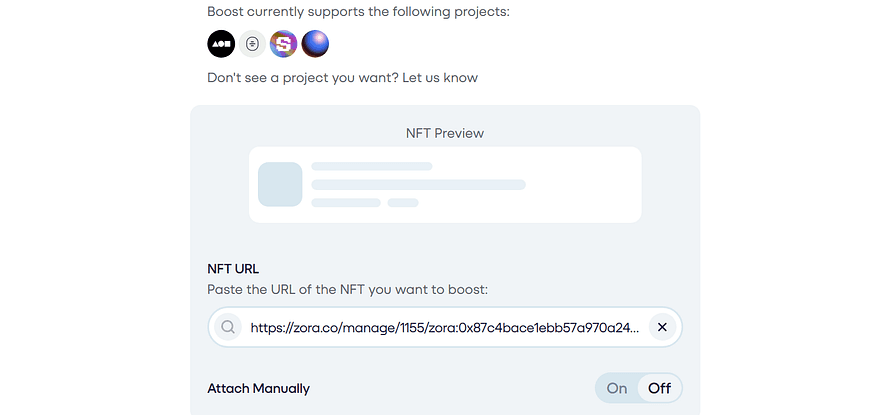
Optional step: There is an “Attach Manually” toggle for those who want to type in the details of the NFT themselves.
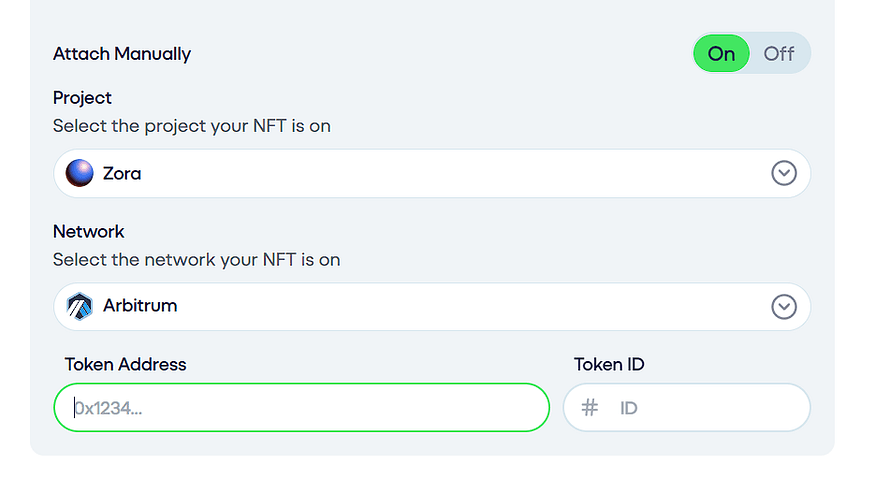
Next, enter the name of the dApp and the network you used to create your NFT, then provide the NFT’s token address and token ID in the corresponding fields.
Example:
Mint link:
https://zora.co/collect/zora:0x87c4bace1ebb57a970a241ea9a1bd1d1cb41dd13/4Token address:
0x87c4bace1ebb57a970a241ea9a1bd1d1cb41dd13Token ID:
4
Once you have finished inputting the details, you will see the NFT Preview!
Select an audience
After that, scroll down to pick your audience. Audiences are the people who will have access to your boosts and earn rewards.
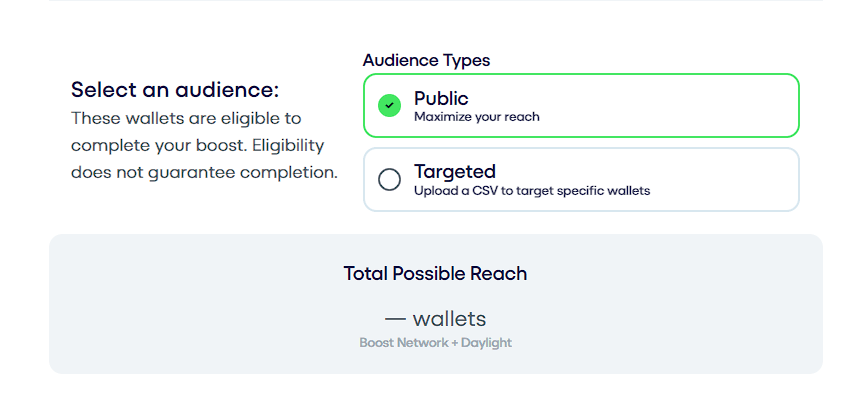
Choose one of the following options:
Public: Select this option to allow anyone to complete your boost. This is ideal for increasing overall engagement with your content.
Targeted: Choose this option if you want to reach a specific audience. You’ll need to upload a list of addresses you wish to target. These could be your friends, community members, or individuals with specific on-chain activities.
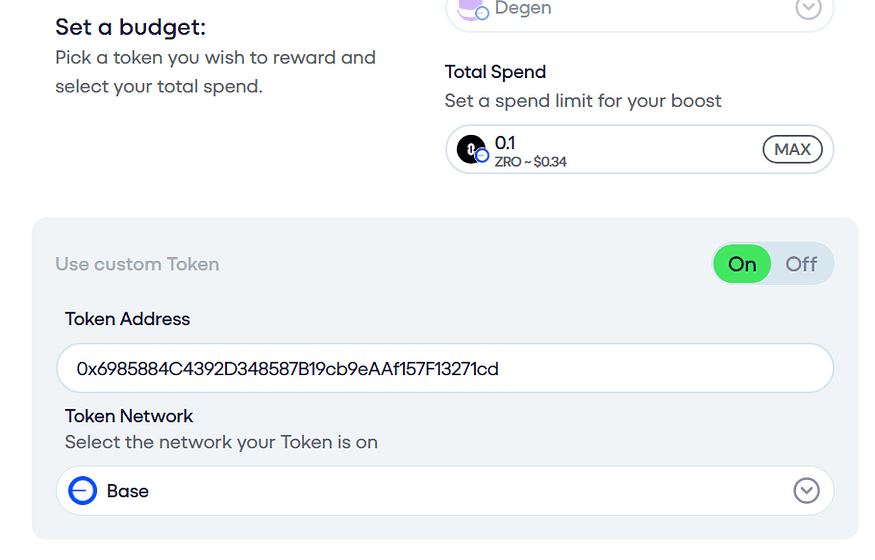
Set a budget:
In this step, you’ll configure the rewards for participants. Select the tokens from Boost’s list then enter the total amount you plan to spend on this boost in the “Total Spend” section.
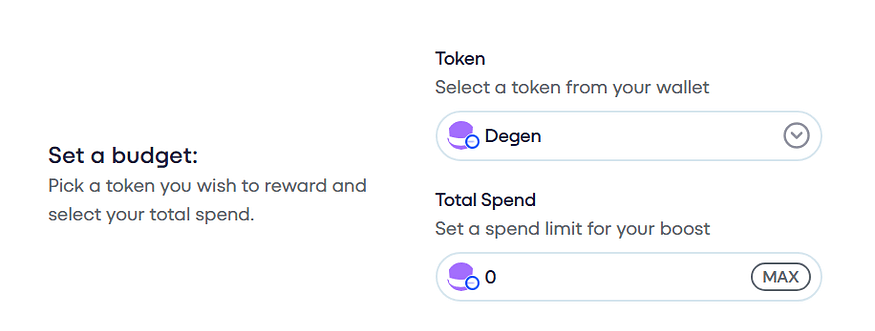
You can also use any token you want. Input the token’s contract and network. The token logo will be reflected in “Total Spend” section.
Choose a reward:
In this section, you will need to define the amount of rewards you will give for each completion.
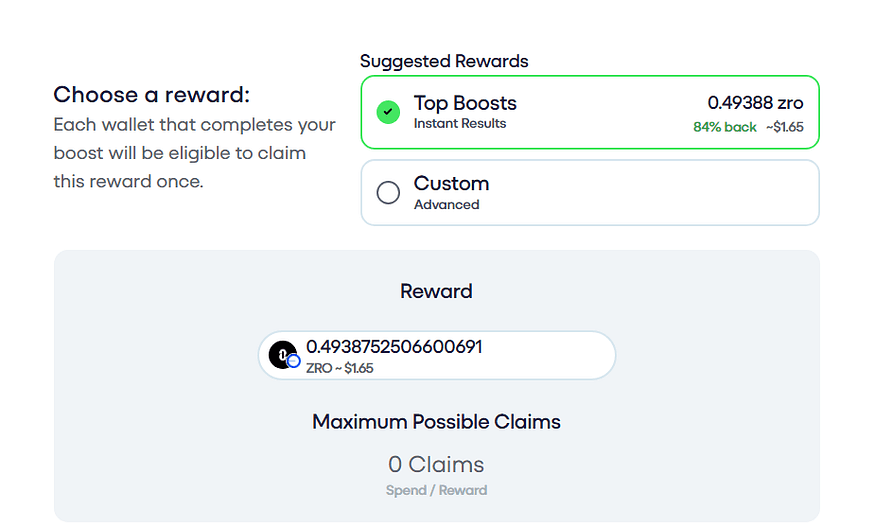
Top Boosts will give you a good amount that should make your boost more efficient.
Custom will let you input the amount you want to reward the participants.
In both cases, the “Maximum Possible Claims” section will show you how many actions will be done from this boost. For example: If your boost is created to boost the mint actions of an NFT, with 3 Claims, your NFT will be minted 3 times and 3 accounts will be able to claim the rewards.
Note: If it shows 0 Claims, you must increase your budget!
Step 3: Finish Your Deployment
Next, review your boost before deploying it! Change the network in your wallet if needed.
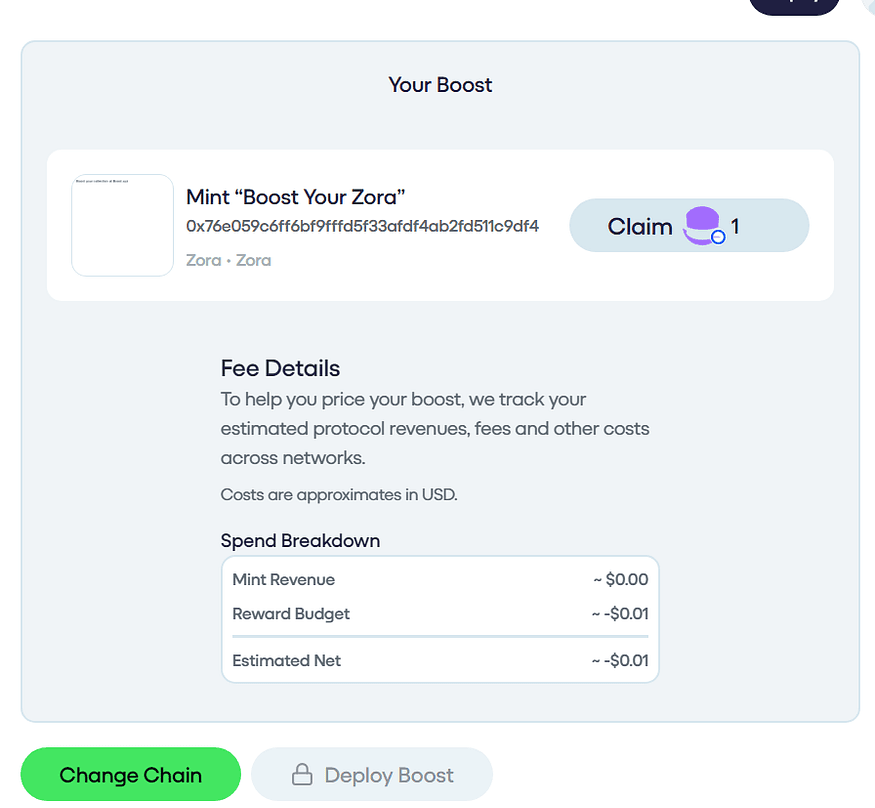
Then approve spending for your tokens.
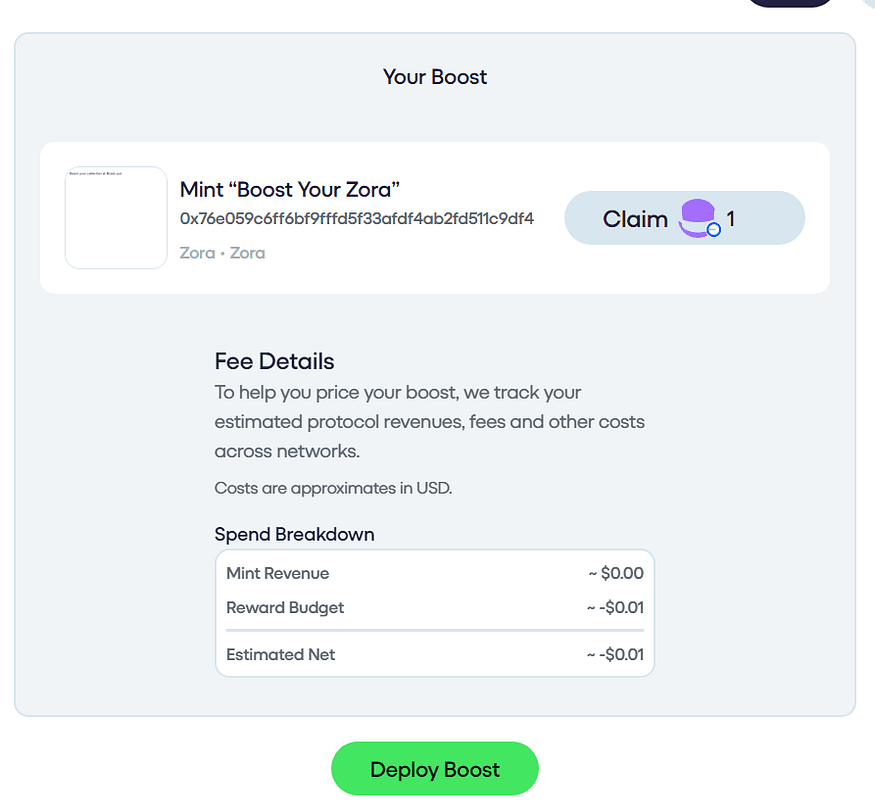
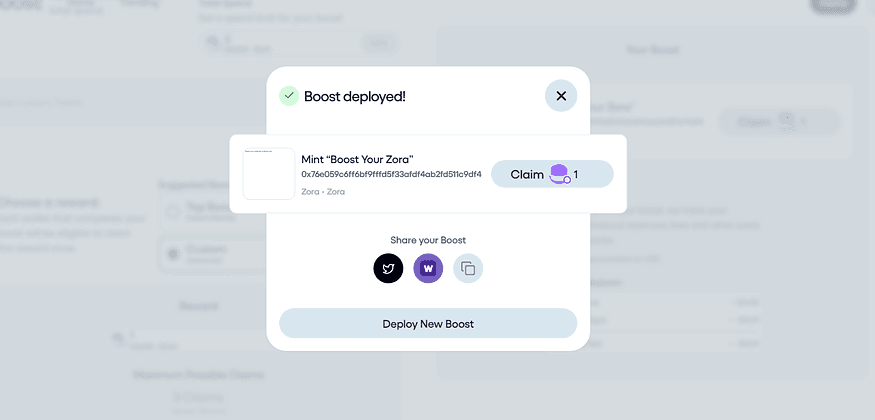
Finally, click “Deploy Boost”, sign a transaction and then your boost will be ready!
Conclusion
I hope this guide will make your first deployment on Boost more comfortable. Should you have any problem, please get in touch with Boost team in the Boost Discord server: https://discord.gg/z3bk3wfK.