
In my last synthetic analog video glitch tutorial the final result was a heavily glitched piece of video. In this After Effects tutorial, I want to focus on creating a similar effect (but a bit more subtle) on the subject of the piece while doing an even more subtle glitch effect on the background. In this piece, we will also be using the original video for the background so that the subject stays in it's original context, while also looking isolated from the background and glitched separately. I've been using this effect more and more and I really like it! There will be a lot of similarities between this tutorial and the last one, so if you followed that, you won't have a problem with this one!
Here's what we're going to make:

The first thing we need is some source footage. For this example, I'm just going to use another cool fish video that I found on Pexels. The video is by Taryn Elliott and can be downloaded here.
Let's start a new project in After Effects and import out source footage and drag it to the timeline to create a composition. I like 4:3 aspect ratios for stuff I'm trying to make look analog, so open the composition settings and change the width to 2880. I adjusted my work area to be 2 seconds long and moved it to a section I liked.
Just like last time, we need to isolate the fish from the background, so I used the Rotobrush tool in After Effects to isolate it. Again, there are countless Rotobrush tutorials, so if you don't know how to do this, YouTube has plenty of help!
Once the subject is isolated, the first thing I always do for this effect is create an adjustment layer above the source footage for color adjustments. We will be using the CC Toner effect again, so we want to make sure that there's good brightness and contrast. I add a curves effect and increase the brightness and contrast for the global channel a bit.

Next, I add a Brightness and Contrast effect and boost both a bit more.

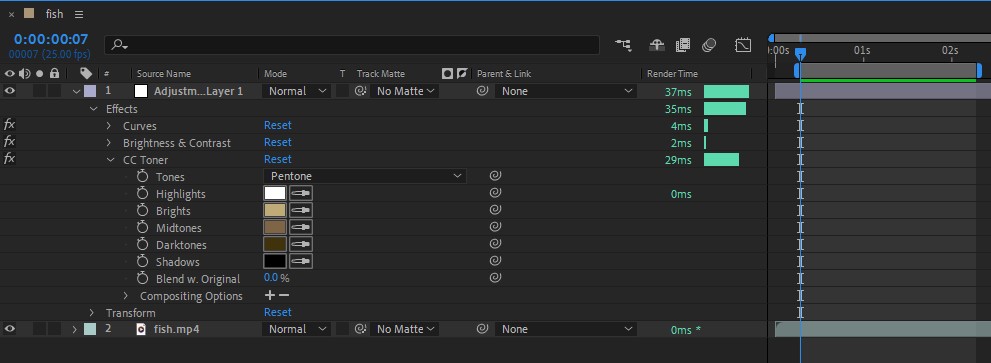
Finally, I add the CC Toner effect and set the "Tones" dropdown to Pentone. Don't worry about what colors to use, we will be animating those using expressions next!

In our composition layers, expand the adjustment layer and then expand Effects and finally expand the CC Toner effect. It should look like this:
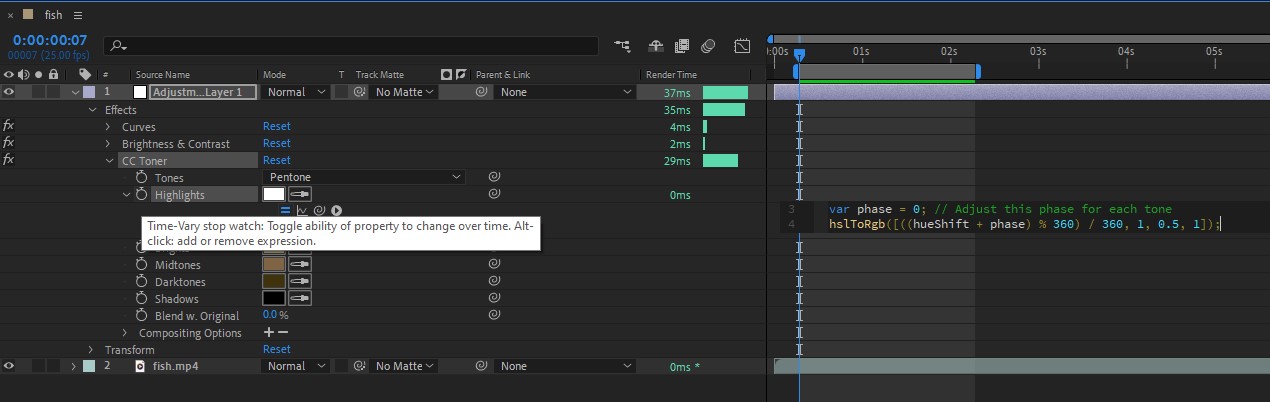
Now, ALT-Click (or Option Click on Mac) the stopwatch to the left of "Highlights". This will open a small text area to write the code for our expression. I wrote my expression for the Highlights and when I was done, it looked like this:
Here are the expressions I used for each tone:
//Highlights
var frequency = .5;
var hueShift = frequency * time * 360;
var phase = 0; // Adjust this phase for each tone
hslToRgb([((hueShift + phase) % 360) / 360, 1, 0.5, 1]);
//Light
var frequency = .5;
var hueShift = frequency * time * 360;
var phase = 72; // Adjust this phase for each tone
hslToRgb([((hueShift + phase) % 360) / 360, 1, 0.5, 1]);//Midtones
var frequency = .5;
var hueShift = frequency * time * 360;
var phase = 144; // Adjust this phase for each tone
hslToRgb([((hueShift + phase) % 360) / 360, 1, 0.5, 1]);//Dark
var frequency = .5;
var hueShift = frequency * time * 360;
var phase = 216; // Adjust this phase for each tone
hslToRgb([((hueShift + phase) % 360) / 360, 1, 0.5, 1]);//Shadows
var frequency = .5;
var hueShift = frequency * time * 360;
var phase = 288; // Adjust this phase for each tone
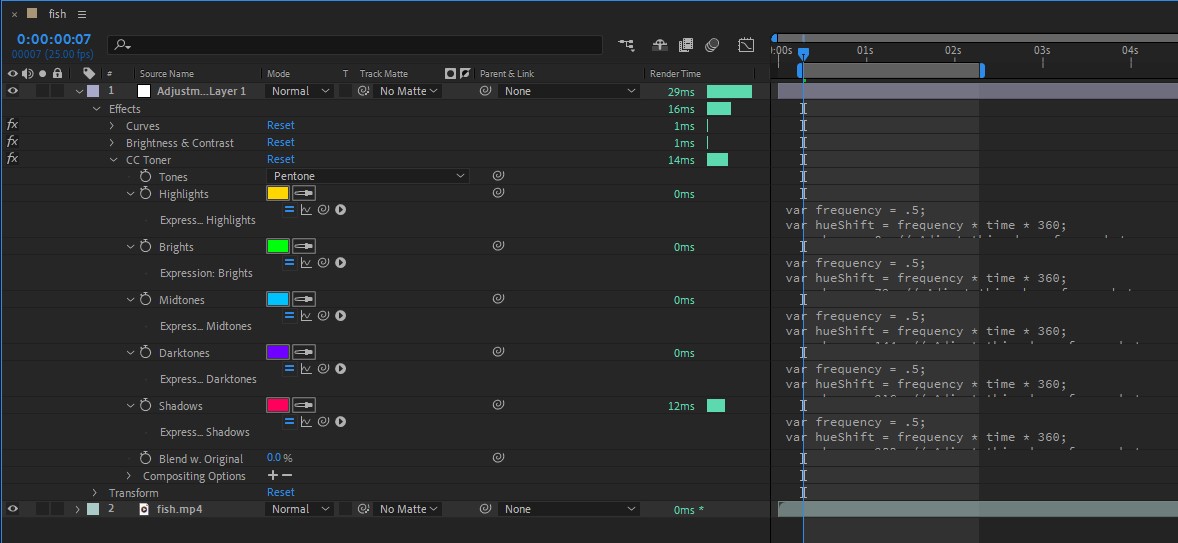
hslToRgb([((hueShift + phase) % 360) / 360, 1, 0.5, 1]);You will notice that all of these expressions are identical with the exception of the Phase variable. The phase offsets each tone's starting color so none of the tones are ever the same. They are offset by 72 each time because there are 5 tones and we want it to go in a full circle of 360 degrees. 360 divided by 5 is 72. The Frequency variable adjusts how fast the colors cycle. A lower frequency is a faster cycle. Since this piece will only be 2 seconds, we are going with 0.5 frequency to make sure it cycles enough. The end result of the expression is that each tone group will cycle through the rainbow of bright saturated colors without ever using white or black.
When all of the expressions are in place it should look like this:
And here's what the fish looks like with the cycling colors:
Nice! That's looking cool. Now rename that adjustment layer to "COLOR" or something like that so you always know what's what. Create a new adjustment layer above that so we can create the feedback effect. In the Feedback layer, I added Echo, Glow, and Signal effects in that order. Signal is a paid plugin, so if you can't pay for it, I recommend trying out NTSCQT which is free and open source and uses the same algorithm as Signal. It's a standalone app though so you will need to export from AE and run this effect and then re-import. It will be a bit of a pain and you will need to learn about exporting clips from AE with alpha channels to make things go better. Here are the settings I used for each of the effects in the Feedback adjustment layer:

Feel free to experiment with these to get your desired look! So, now our composition should have the source footage and two adjustment layers. Mine looks like this:

Here's what the fish looks like with both the color and feedback adjustment layers:
It's time to work on adding a more subtle VHS glitch effect to the background. Select all three layers, right-click, and choose "Pre-Compose". Next, drag the original source footage below your pre-composition like this:

Already looks pretty cool! Now I want an adjustment layer between the two layers so that it will only apply to the background. I add the Signal effect again and here are the settings I used:

Now, in the composition, expand your adjustment layer, expand Effects, and expand Signal. Move the playhead to the first frame of your work area and click the stopwatch button next to the Random Seed setting in Signal to create a new keyframe. The seed should start with 1. Now go to the last frame of your workarea and set a high value for the random seed. I used 420420:
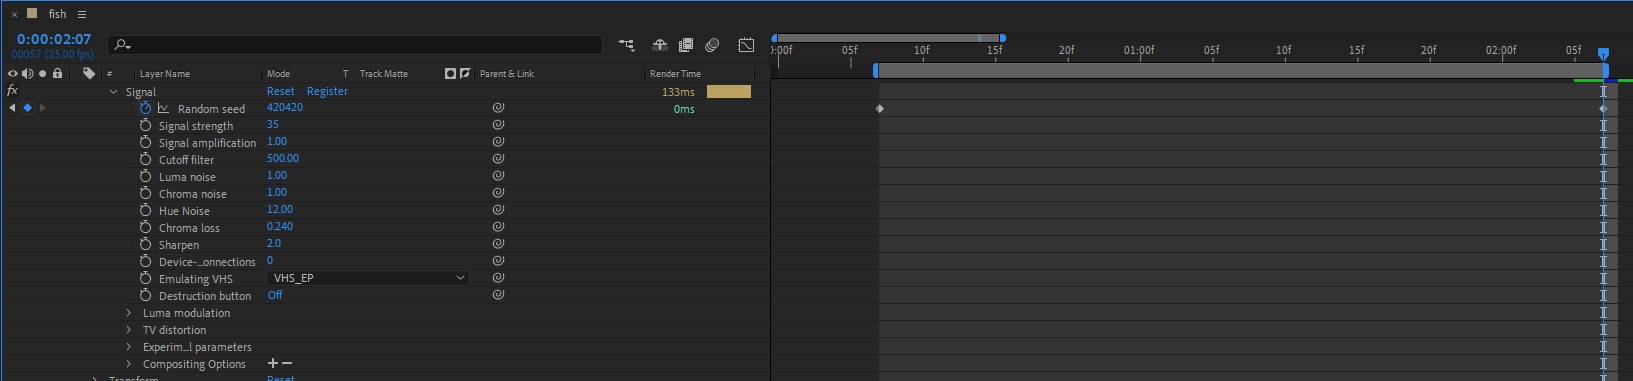
This will simply change the random seed throughout the 2 second clip rapidly and make the Signal effect a bit more dynamic and realistic.
The final outcome!
There are a billion ways to tweak on this effect and make it your own! If you like the final result, you can mint a free edition on Zora (you just pay mint fee/gas on the Base network)

